2022年8月9日 星期二

Yii 2心得

環境

Windows 10
PHP 8
nginx
MySQL 8.0.18
yiisoft/yii2 2.0.45
dmstr/yii2-adminlte-asset 2.6.2
mdmsoft/yii2-admin 2.12


安裝 Yii 2 Advanced Project Template


使用composer 安裝

$ composer2 create-project --prefer-dist yiisoft/yii2-app-advanced yii-application


準備

初始化

在 yii-application/ 目錄中執行
$ php init
Yii Application Initialization Tool v1.0

Which environment do you want the application to be initialized in?

  [0] Development
  [1] Production

  Your choice [0-1, or "q" to quit] 0


  Initialize the application under 'Development' environment? [yes|no] yes

  Start initialization ...

   generate backend/config/codeception-local.php
   generate backend/config/main-local.php
   generate backend/config/params-local.php
   generate backend/config/test-local.php
   generate backend/web/index-test.php
   generate backend/web/index.php
   generate backend/web/robots.txt
   generate common/config/codeception-local.php
   generate common/config/main-local.php
   generate common/config/params-local.php
   generate common/config/test-local.php
   generate console/config/main-local.php
   generate console/config/params-local.php
   generate console/config/test-local.php
   generate frontend/config/codeception-local.php
   generate frontend/config/main-local.php
   generate frontend/config/params-local.php
   generate frontend/config/test-local.php
   generate frontend/web/index-test.php
   generate frontend/web/index.php
   generate frontend/web/robots.txt
   generate yii
   generate yii_test
   generate yii_test.bat
   generate cookie validation key in backend/config/main-local.php
   generate cookie validation key in common/config/codeception-local.php
   generate cookie validation key in frontend/config/main-local.php
      chmod 0777 backend/runtime
      chmod 0777 backend/web/assets
      chmod 0777 console/runtime
      chmod 0777 frontend/runtime
      chmod 0777 frontend/web/assets
      chmod 0755 yii
      chmod 0755 yii_test

  ... initialization completed.

配置DB

common/config/main-local.php 

migration

$ php yii migrate
Yii Migration Tool (based on Yii v2.0.45)

Creating migration history table "migration"...Done.
Total 2 new migrations to be applied:
        m130524_201442_init
        m190124_110200_add_verification_token_column_to_user_table

Apply the above migrations? (yes|no) [no]:yes
*** applying m130524_201442_init
    > create table {{%user}} ... done (time: 0.064s)
*** applied m130524_201442_init (time: 0.097s)

*** applying m190124_110200_add_verification_token_column_to_user_table
    > add column verification_token string NULL DEFAULT NULL to table {{%user}} ... done (time: 0.040s)
*** applied m190124_110200_add_verification_token_column_to_user_table (time: 0.064s)


2 migrations were applied.

Migrated up successfully.

nginx

前端目錄 root /path/to/yii-application/frontend/web/ 
後端目錄 root /path/to/yii-application/backend/web/

偽靜態

location / {
    # Redirect everything that isn't a real file to index.php
    try_files $uri $uri/ /index.php$is_args$args;
}

避免存取assets/目錄下的php文件

# deny accessing php files for the /assets directory
location ~ ^/assets/.*\.php$ {
    deny all;
}

hosts

略

寶塔open_basedir報錯

Warning: require(): open_basedir restriction in effect. File(C:\path\yii-application\vendor\autoload.php) is not within the allowed path(s): (C:/path/yii-application/backend/web/;C:/Windows/Temp/;C:/Temp/;C:/BtSoft/temp/session/) in C:\path\yii-application\backend\web\index.php on line 6

Warning: require(C:\path\yii-application\vendor\autoload.php): Failed to open stream: Operation not permitted in C:\path\yii-application\backend\web\index.php on line 6

Fatal error: Uncaught Error: Failed opening required 'C:\path\yii-application\backend\web/../../vendor/autoload.php' (include_path='.;C:\php\pear') in C:\path\yii-application\backend\web\index.php:6 Stack trace: #0 {main} thrown in C:\path\yii-application\backend\web\index.php on line 6

寶塔面板 => 網站 => 設置 => 網站目錄 => 取消勾選 防跨站攻击(open_basedir)

測試用戶

backend/tests/_data/login_data.php 中有測試的user資料

return [
    [
        'username' => 'erau',
        'auth_key' => 'tUu1qHcde0diwUol3xeI-18MuHkkprQI',
        // password_0
        'password_hash' => '$2y$13$nJ1WDlBaGcbCdbNC5.5l4.sgy.OMEKCqtDQOdQ2OWpgiKRWYyzzne',
        'password_reset_token' => 'RkD_Jw0_8HEedzLk7MM-ZKEFfYR7VbMr_1392559490',
        'created_at' => '1392559490',
        'updated_at' => '1392559490',
        'email' => 'sfriesen@jenkins.info',
    ],
];
把他換成SQL

INSERT INTO `user` ( `username`, `auth_key`, `password_hash`, `password_reset_token`, `email`, `created_at`, `updated_at` )
VALUES
    (
        'erau',
        'tUu1qHcde0diwUol3xeI-18MuHkkprQI',
        '$2y$13$nJ1WDlBaGcbCdbNC5.5l4.sgy.OMEKCqtDQOdQ2OWpgiKRWYyzzne',
        'RkD_Jw0_8HEedzLk7MM-ZKEFfYR7VbMr_1392559490',
        'sfriesen@jenkins.info',
    1392559490,
    1392559490);
s
然後就能用用戶 erau (密碼password_0)登錄了,
或是登錄時斷點在 User->validatePassword() 時打印 Yii::$app->security->generatePasswordHash("password") 設置你要的密碼

安裝AdminLTE


$ composer2 require dmstr/yii2-adminlte-asset "^2.1"


複製 vendor/dmstr/yii2-adminlte-asset/example-views/yiisoft/yii2-app/ 到 backend/views/  

不要使用bootstrap4


因為 AdminLTE 2.4.13 使用 bootstrap 3 ,但是 yii2-app-advanced 2.0.43 以後的 backend/assets/AppAsset.php 改用了 bootstrap4 ,會造成樣式衝突
所以改回bootstrap 3

diff --git a/backend/assets/AppAsset.php b/backend/assets/AppAsset.php
index a93f5c3..ee9d874 100644
--- a/backend/assets/AppAsset.php
+++ b/backend/assets/AppAsset.php
@@ -18,6 +18,7 @@ class AppAsset extends AssetBundle
     ];
     public $depends = [
         'yii\web\YiiAsset',
-        'yii\bootstrap4\BootstrapAsset',
+        // 'yii\bootstrap4\BootstrapAsset',
+        'yii\bootstrap\BootstrapAsset',
     ];
 }
s

安裝yii2-admin

http://static.kancloud.cn/curder/yii/247758  Yii2中使用yii2-admin搭建RBAC权限控制
http://static.kancloud.cn/curder/yii/247759  Yii2项目后台整合yii2-admin模块


$ composer2 require mdmsoft/yii2-admin "~2.0"

Migration

新增menu菜單表 

$ php yii migrate --migrationPath=@mdm/admin/migrations
Yii Migration Tool (based on Yii v2.0.45)

Total 2 new migrations to be applied:
        m140602_111327_create_menu_table
        m160312_050000_create_user

Apply the above migrations? (yes|no) [no]:yes
*** applying m140602_111327_create_menu_table
    > create table {{%menu}} ... done (time: 0.197s)
*** applied m140602_111327_create_menu_table (time: 0.414s)

*** applying m160312_050000_create_user
*** applied m160312_050000_create_user (time: 0.037s)

2 migrations were applied.

Migrated up successfully.

新增 rbac 相關表(auth_rule、auth_item、auth_item_child、auth_assignment)

$ php yii migrate --migrationPath=@yii/rbac/migrations
Yii Migration Tool (based on Yii v2.0.45)

Total 4 new migrations to be applied:
        m140506_102106_rbac_init
        m170907_052038_rbac_add_index_on_auth_assignment_user_id
        m180523_151638_rbac_updates_indexes_without_prefix
        m200409_110543_rbac_update_mssql_trigger

Apply the above migrations? (yes|no) [no]:yes
*** applying m140506_102106_rbac_init
    > create table {{%auth_rule}} ... done (time: 0.058s)
    > create table {{%auth_item}} ... done (time: 0.059s)
    > create index idx-auth_item-type on {{%auth_item}} (type) ... done (time: 0.039s)
    > create table {{%auth_item_child}} ... done (time: 0.060s)
    > create table {{%auth_assignment}} ... done (time: 0.042s)
*** applied m140506_102106_rbac_init (time: 0.445s)

*** applying m170907_052038_rbac_add_index_on_auth_assignment_user_id
    > create index auth_assignment_user_id_idx on {{%auth_assignment}} (user_id) ... done (time: 0.037s)
*** applied m170907_052038_rbac_add_index_on_auth_assignment_user_id (time: 0.091s)

*** applying m180523_151638_rbac_updates_indexes_without_prefix
    > drop index auth_assignment_user_id_idx on {{%auth_assignment}} ... done (time: 0.018s)
    > create index {{%idx-auth_assignment-user_id}} on {{%auth_assignment}} (user_id) ... done (time: 0.021s)
    > drop index idx-auth_item-type on {{%auth_item}} ... done (time: 0.046s)
    > create index {{%idx-auth_item-type}} on {{%auth_item}} (type) ... done (time: 0.034s)
*** applied m180523_151638_rbac_updates_indexes_without_prefix (time: 0.185s)

*** applying m200409_110543_rbac_update_mssql_trigger
*** applied m200409_110543_rbac_update_mssql_trigger (time: 0.049s)


4 migrations were applied.

Migrated up successfully.


配置


diff --git a/backend/config/main.php b/backend/config/main.php
index 6e2fe57..1483c5c 100644
--- a/backend/config/main.php
+++ b/backend/config/main.php
@@ -11,7 +11,12 @@
     'basePath' => dirname(__DIR__),
     'controllerNamespace' => 'backend\controllers',
     'bootstrap' => ['log'],
-    'modules' => [],
+    'modules' => [
+        'admin' => [
+            'class' => 'mdm\admin\Module',
+            // 'layout' => 'left-menu',//yii2-admin的导航菜单
+        ]
+    ],
     'components' => [
         'request' => [
             'csrfParam' => '_csrf-backend',
@@ -37,14 +42,34 @@
         'errorHandler' => [
             'errorAction' => 'site/error',
         ],
-        /*
+        // 開啟enablePrettyUrl
         'urlManager' => [
             'enablePrettyUrl' => true,
             'showScriptName' => false,
             'rules' => [
             ],
         ],
-        */
+
+        'authManager' => [
+            // 'class' => 'yii\rbac\PhpManager', // or use 'yii\rbac\DbManager'
+            'class' => 'yii\rbac\DbManager', // 使用DB做RBAC
+        ],
     ],
     'params' => $params,
+    'as access' => [
+        'class' => 'mdm\admin\components\AccessControl',
+        'allowActions' => [
+            'site/*',
+            'admin/*', // 臨時開啟admin 路由
+            'gii/*',  // 臨時開啟gii
+            'debug/*',  // debug bar
+            // '*',  // 臨時開啟所有權限
+            'some-controller/some-action',
+            // The actions listed here will be allowed to everyone including guests.
+            // So, 'admin/*' should not appear here in the production, of course.
+            // But in the earlier stages of your development, you may probably want to
+            // add a lot of actions here until you finally completed setting up rbac,
+            // otherwise you may not even take a first step.
+        ]
+    ],
 ];

s
開啟enablePrettyUrl前的訪問地址是: /index.php?r=admin  

使用

Users(用戶)


Routes(路由)


把左邊可用的路由(會自動抓)放到右邊去,右邊的路由才會在permission和role時出現

Permissions(權限)


分配路由

創建permission後,可以在view裡面對該permission設置多個route

Roles(角色)


分配路由和權限

創建role後,可以在view裡面對該role設置多個route、permission和role

Assignments(分配)


分配角色和權限

根據現有的user,可以在view裡面對該user設置多個role和permission

無權限訪問顯示403

如果沒對該用戶分配有delete權限的role和delete的permission 


Rules(規則)

要和代碼配合,可以不用

Menus(菜單)


設置父菜單


獲取有權限的菜單


diff --git a/backend/views/layouts/left.php b/backend/views/layouts/left.php
index 53b2cb3..f2b64a1 100644
--- a/backend/views/layouts/left.php
+++ b/backend/views/layouts/left.php
@@ -1,3 +1,8 @@
+<?php
+
+use mdm\admin\components\MenuHelper;
+
+?>
 <aside class="main-sidebar">
 
     <section class="sidebar">
@@ -25,42 +30,57 @@
             </div>
         </form>
         <!-- /.search form -->
+        <?php
+        $items = MenuHelper::getAssignedMenu(Yii::$app->user->id);
+        ?>
 
         <?= dmstr\widgets\Menu::widget(
             [
                 'options' => ['class' => 'sidebar-menu tree', 'data-widget'=> 'tree'],
+                'items' => $items,
             ]
         ) ?>
s

設置父菜單js錯誤

Uncaught TypeError: elem.getClientRects is not a function

因為 jQuery 是v3.6.0 (vendor/bower-asset/jquery/dist/jquery.js)而 jQuery UI 是 v1.11.4 (vendor/mdmsoft/yii2-admin/assets/jquery-ui.js)

升級jQuery UI(未使用)

https://github.com/mdmsoft/yii2-admin/issues/386  jquery-ui.js need to update !!!
https://github.com/mdmsoft/yii2-admin/pull/363  Fix menu. Update jquery-ui.


加入 jquery-migrate

https://stackoverflow.com/a/38314852  jQuery UI error - f.getClientRects is not a function
加入 jquery-migrate-3.0.0.js 讓jquery 3+ 兼容低版本jquery ui

diff --git a/backend/assets/AppAsset.php b/backend/assets/AppAsset.php
index ee9d874..ac1f620 100644
--- a/backend/assets/AppAsset.php
+++ b/backend/assets/AppAsset.php
@@ -15,6 +15,7 @@ class AppAsset extends AssetBundle
         'css/site.css',
     ];
     public $js = [
+        'js/jquery-migrate-3.0.0.js',
     ];
     public $depends = [
         'yii\web\YiiAsset',
diff --git a/backend/web/js/jquery-migrate-3.0.0.js b/backend/web/js/jquery-migrate-3.0.0.js
new file mode 100644
index 0000000..350b799
--- /dev/null
+++ b/backend/web/js/jquery-migrate-3.0.0.js
@@ -0,0 +1,540 @@
+/*!
+ * jQuery Migrate - v3.0.0 - 2016-06-09
...
s

Gii

https://www.yiichina.com/tutorial/695  gii的命令行用法 [ 2.0 版本 ]


先建表,以水果表為例:

CREATE TABLE `fruits` (
  `id` int(11) NOT NULL AUTO_INCREMENT COMMENT 'ID',
  `name` varchar(255) COLLATE utf8mb4_unicode_ci NOT NULL DEFAULT '' COMMENT '名字',
  `created_at` datetime NOT NULL COMMENT '創建時間',
  `updated_at` datetime NOT NULL ON UPDATE CURRENT_TIMESTAMP COMMENT '修改時間',
  PRIMARY KEY (`id`)
) ENGINE=InnoDB AUTO_INCREMENT=1 DEFAULT CHARSET=utf8mb4 COLLATE=utf8mb4_unicode_ci;
s

網頁生成CRUD代碼

Table Name 可以下拉用選的,選完後 Model Class Name 會自動填入


命令行生成CRUD代碼

為了和前面區分,這裡model和controller用單數的Fruit
$ php yii gii/model --ns=common\\models --tableName=fruits --modelClass=Fruit
Running 'Model Generator'...

The following files will be generated:
        [new] C:\path\yii-application\common\models\Fruit.php

Ready to generate the selected files? (yes|no) [yes]:

Files were generated successfully!
Generating code using template "C:\path\yii-application\vendor\yiisoft\yii2-gii\src\generators\model/default"...
 generated C:\path\yii-application\common\models\Fruit.php
done!

--ns=common\\models - 指定Model的路徑
--tableName=fruits - 表名用複數
--modelClass=Fruit - Model名用單數

$ php yii gii/crud --modelClass=common\\models\\Fruit --controllerClass=backend\\controllers\\FruitController --viewPath=@backend/views/fruit --searchModelClass=common\\models\\FruitSearch
Running 'CRUD Generator'...

The following files will be generated:
        [new] C:\path\yii-application\backend\controllers\FruitController.php
        [new] C:\path\yii-application\common\models\FruitSearch.php
        [new] C:\path\yii-application\backend\views\fruit\_form.php
        [new] C:\path\yii-application\backend\views\fruit\_search.php
        [new] C:\path\yii-application\backend\views\fruit\create.php
        [new] C:\path\yii-application\backend\views\fruit\index.php
        [new] C:\path\yii-application\backend\views\fruit\update.php
        [new] C:\path\yii-application\backend\views\fruit\view.php

Ready to generate the selected files? (yes|no) [yes]:

Files were generated successfully!
Generating code using template "C:\path\yii-application\vendor\yiisoft\yii2-gii\src\generators\crud/default"...
 generated C:\path\yii-application\backend\controllers\FruitController.php
 generated C:\path\yii-application\common\models\FruitSearch.php
 generated C:\path\yii-application\backend\views\fruit\_form.php
 generated C:\path\yii-application\backend\views\fruit\_search.php
 generated C:\path\yii-application\backend\views\fruit\create.php
 generated C:\path\yii-application\backend\views\fruit\index.php
 generated C:\path\yii-application\backend\views\fruit\update.php
 generated C:\path\yii-application\backend\views\fruit\view.php
done!

--modelClass=common\\models\\Fruit - 指定所使用的model路徑
--controllerClass=backend\\controllers\\FruitController - 設置控制器路徑
--viewPath=@backend/views/fruit - 設置視圖路徑,fruit用單數
--searchModelClass=common\\models\\FruitSearch= 設定搜索模型

如何知道命令行有哪些參數可用

如 searchModelClass 
可在開發者工具裡的表單查看


即可有水果表(fruits)的CRUD

debugbar

內建debugbar,laravel則需要另外安裝
路由


CVE


https://packagist.org/packages/yiisoft/yii2/advisories?version=4339826  yiisoft/yii2 Security Advisories for 2.0.37
2.0.37之前的版本有 遠程代碼執行(remote code execution)漏洞

總結

和laravel相比,官方更新沒有那麼快搭建後台系統比較麻煩(dmstr/yii2-adminlte-asset + mdmsoft/yii2-admin),不像laravel-admin直接搞定,網上的文檔也比較舊


其他

update

https://stackoverflow.com/a/38692364  Yii2: update field with query builder

\Yii::$app->db->createCommand()
    ->update('fruits', ['status' => 1], 'id > 1')
    ->execute();
=> UPDATE `fruits` SET `status`=1 WHERE id > 1


2022年6月30日 星期四

ScreenToGif

安裝

Microsoft Store 直接安裝

使用

打開應用程式後

螢幕錄影

調整大小,開始錄影,停止


編輯

播放,減少影格數(2次),刪除前面所有影格,刪除後面所有影格

圖片

多選影格,效果(像素化),形狀

保存(ctrl+s)

可輸出gif或影片


結果


輸出影片需設定FFmpeg路徑


下載FFmpeg


解壓縮,設定環境變量(Path),然後就能輸出影片(mp4)


2022年6月13日 星期一

Vue心得2022

前言

寫了 Vue心得 之後,在這年又開始寫Vue了

版本

$ node -v
v16.13.1

$ npm -v
8.1.2

$ vue --version
@vue/cli 5.0.4

創建一個新項目

$ vue create vue2022

手動選擇

? Please pick a preset:
  Default ([Vue 3] babel, eslint) 
  Default ([Vue 2] babel, eslint) 
> Manually select features

選擇需要的feature

? Check the features needed for your project: (Press <space> to select, <a> to toggle all, <i> to invert selection, and <enter> to proceed)
 (*) Babel
 ( ) TypeScript
 ( ) Progressive Web App (PWA) Support
 (*) Router
>(*) Vuex
 ( ) CSS Pre-processors
 (*) Linter / Formatter
 ( ) Unit Testing
 ( ) E2E Testing

選擇vue版本

? Choose a version of Vue.js that you want to start the project with 
  3.x
> 2.x

使用history 模式

? Use history mode for router? (Requires proper server setup for index fallback in production) (Y/n) Y

選擇linter / formatter配置

? Pick a linter / formatter config: 
  ESLint with error prevention only 
  ESLint + Airbnb config
> ESLint + Standard config
  ESLint + Prettier


? Pick additional lint features: (Press <space> to select, <a> to toggle all, <i> to invert selection, and <enter> to proceed)
>(*) Lint on save
 ( ) Lint and fix on commit

配置文件

? Where do you prefer placing config for Babel, ESLint, etc.? (Use arrow keys)
> In dedicated config files
  In package.json


新建完專案後,會自動提交一個init的git commit


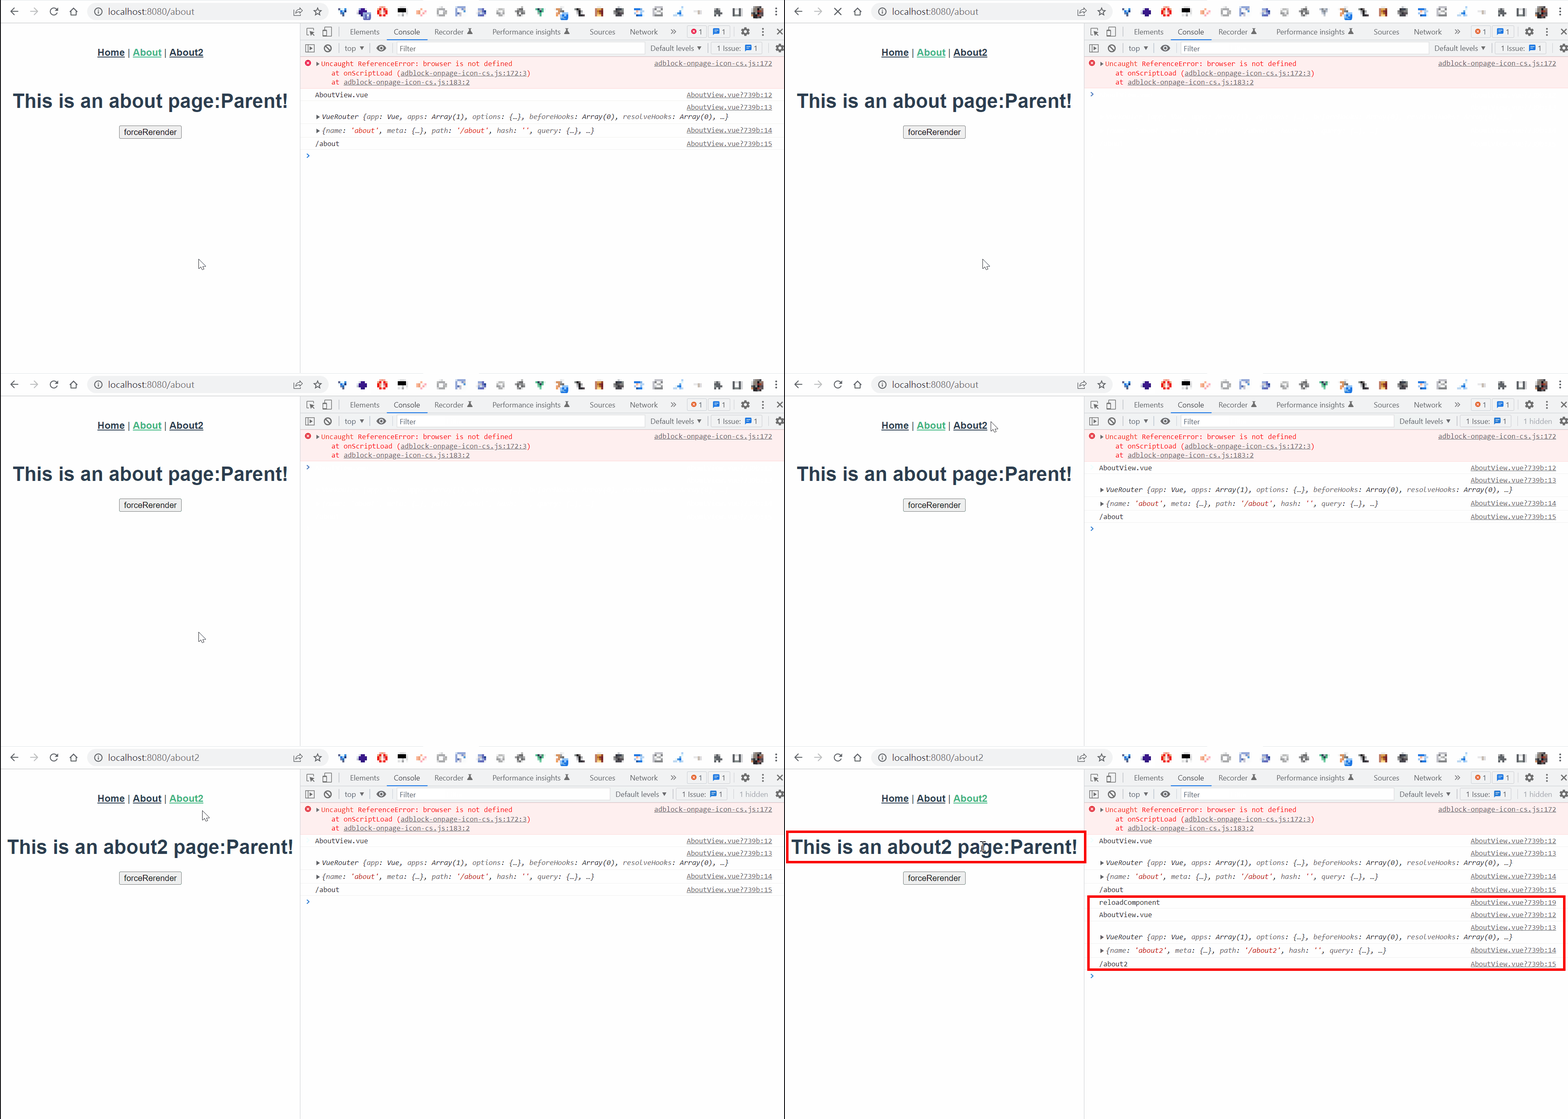
同組件路由切換時不重新渲染組件

如/about2 和 /about 都使用 views/AboutView.vue 組件:

diff --git a/src/App.vue b/src/App.vue
index 240acf4..2995013 100644
--- a/src/App.vue
+++ b/src/App.vue
@@ -2,7 +2,8 @@
   <div id="app">
     <nav>
       <router-link to="/">Home</router-link> |
-      <router-link to="/about">About</router-link>
+      <router-link to="/about">About</router-link> |
+      <router-link to="/about2">About2</router-link>
     </nav>
     <router-view/>
   </div>
diff --git a/src/router/index.js b/src/router/index.js
index a395a1f..5d09db5 100644
--- a/src/router/index.js
+++ b/src/router/index.js
@@ -17,6 +17,11 @@ const routes = [
     // this generates a separate chunk (about.[hash].js) for this route
     // which is lazy-loaded when the route is visited.
     component: () => import(/* webpackChunkName: "about" */ '../views/AboutView.vue')
+  },
+  {
+    path: '/about2',
+    name: 'about2',
+    component: () => import(/* webpackChunkName: "about" */ '../views/AboutView.vue')
   }
 ]
 
diff --git a/src/views/AboutView.vue b/src/views/AboutView.vue
index 3fa2807..16bb285 100644
--- a/src/views/AboutView.vue
+++ b/src/views/AboutView.vue
@@ -1,5 +1,17 @@
 <template>
   <div class="about">
-    <h1>This is an about page</h1>
+    <h1>This is an {{$route.name}} page</h1>
   </div>
 </template>
+
+<script>
+export default {
+  name: 'AboutView',
+  created () {
+    console.log('AboutView.vue')
+    console.log(this.$router)
+    console.log(this.$route)
+    console.log(this.$route.path)
+  }
+}
+</script>
s
切換路由時,組件的created不被呼叫

自動更新 - :key="$route.fullPath"

https://stackoverflow.com/a/51170320  Do we have router.reload in vue-router?
https://stackoverflow.com/a/49646063  Vue-router reload components
在組件上新增 :key="$route.fullPath"
diff --git a/src/App.vue b/src/App.vue
index 69ddd1a..4f3e76c 100644
--- a/src/App.vue
+++ b/src/App.vue
@@ -8,6 +8,7 @@
     <router-view
+      :key="$route.fullPath"/>
   </div>
 </template>
s

手動更新 - :key="componentKey"

https://stackoverflow.com/a/54367510  Can you force Vue.js to reload/re-render?

diff --git a/src/App.vue b/src/App.vue
index 4f3e76c..e4e7a4a 100644
--- a/src/App.vue
+++ b/src/App.vue
@@ -8,7 +8,8 @@
     <router-view
       :parentString="string"
       @reloadComponentEvent="emitReloadComponentEvent($event)"
+      :key="componentKey"
+      @forceRerenderEvent="emitForceRerenderEvent($event)"
       v-if="isRouterAlive"/>
   </div>
 </template>
@@ -18,7 +19,8 @@ export default {
   data () {
     return {
       isRouterAlive: true,
+      componentKey: 0
     }
   },
   methods: {
@@ -28,6 +30,14 @@ export default {
     },
     emitReloadComponentEvent () {
       this.reload()
+    },
+    forceRerender () {
+      this.componentKey += 1
+    },
+    emitForceRerenderEvent (name) {
+      console.log('emitForceRerenderEvent')
+      console.log(name)
+      this.forceRerender()
     }
   }
 }
diff --git a/src/views/AboutView.vue b/src/views/AboutView.vue
index fafb0f5..7678eb2 100644
--- a/src/views/AboutView.vue
+++ b/src/views/AboutView.vue
@@ -1,6 +1,7 @@
 <template>
   <div class="about">
     <h1 @click="reloadComponent">This is an {{$route.name}} page:{{parentString}}</h1>
+    <button @click="clickForceRerender">forceRerender</button>
   </div>
 </template>
 
@@ -17,6 +18,10 @@ export default {
     reloadComponent () {
       console.log('reloadComponent')
       this.$emit('reloadComponentEvent', this.$route.name)
+    },
+    clickForceRerender () {
+      console.log('forceRerender')
+      this.$emit('forceRerenderEvent', this.$route.name)
     }
   },
   props: {
s

手動更新 - this.$nextTick()

https://www.zhihu.com/question/49863095/answer/289157209  请问vue组件如何reload或者说vue-router如何刷新当前的route??

diff --git a/src/App.vue b/src/App.vue
index 2995013..3eb8189 100644
--- a/src/App.vue
+++ b/src/App.vue
@@ -5,10 +5,31 @@
       <router-link to="/about">About</router-link> |
       <router-link to="/about2">About2</router-link>
     </nav>
-    <router-view/>
+    <router-view
+      @reloadComponentEvent="emitReloadComponentEvent($event)"
+      v-if="isRouterAlive"/>
   </div>
 </template>
 
+<script>
+export default {
+  data () {
+    return {
+      isRouterAlive: true
+    }
+  },
+  methods: {
+    reload () {
+      this.isRouterAlive = false
+      this.$nextTick(() => (this.isRouterAlive = true))
+    },
+    emitReloadComponentEvent () {
+      this.reload()
+    }
+  }
+}
+</script>
+
 <style>
 #app {
   font-family: Avenir, Helvetica, Arial, sans-serif;
diff --git a/src/views/AboutView.vue b/src/views/AboutView.vue
index 16bb285..545956a 100644
--- a/src/views/AboutView.vue
+++ b/src/views/AboutView.vue
@@ -1,6 +1,6 @@
 <template>
   <div class="about">
-    <h1>This is an {{$route.name}} page</h1>
+    <h1 @click="reloadComponent">This is an {{$route.name}} page</h1>
   </div>
 </template>
 
@@ -12,6 +12,12 @@ export default {
     console.log(this.$router)
     console.log(this.$route)
     console.log(this.$route.path)
+  },
+  methods: {
+    reloadComponent () {
+      console.log('reloadComponent')
+      this.$emit('reloadComponentEvent', this.$route.name)
+    }
   }
 }
 </script>
s

特定路由被緩存

https://www.jianshu.com/p/0b0222954483  vue-router 之 keep-alive
指定首頁(home)緩存 => 即不重新渲染,HomeView.vue不重複呼叫created()
about、about2不緩存 => about、about2需用不同組件(component)

diff --git a/src/App.vue b/src/App.vue
index eda18d3..588bafb 100644
--- a/src/App.vue
+++ b/src/App.vue
@@ -5,12 +5,14 @@
       <router-link to="/about">About</router-link> |
       <router-link to="/about2">About2</router-link>
     </nav>
+    <keep-alive>
+      <router-view v-if="$route.meta.keepAlive">
+        <!-- 这里是会被缓存的视图组件,比如 home -->
+      </router-view>
+    </keep-alive>
+    <router-view v-if="!$route.meta.keepAlive">
+      <!-- 这里是不被缓存的视图组件,比如 about、about2 -->
+    </router-view>
   </div>
 </template>
 
diff --git a/src/components/HelloWorld.vue b/src/components/HelloWorld.vue
index 1c544cb..f59096c 100644
--- a/src/components/HelloWorld.vue
+++ b/src/components/HelloWorld.vue
@@ -37,6 +37,9 @@ export default {
   name: 'HelloWorld',
   props: {
     msg: String
+  },
+  created () {
+    console.log('HelloWorld.vue')
   }
 }
 </script>
diff --git a/src/router/index.js b/src/router/index.js
index 5d09db5..1b097c7 100644
--- a/src/router/index.js
+++ b/src/router/index.js
@@ -8,7 +8,10 @@ const routes = [
   {
     path: '/',
     name: 'home',
+    component: HomeView,
+    meta: {
+      keepAlive: true // 需要被缓存
+    }
   },
   {
     path: '/about',
@@ -16,12 +19,18 @@ const routes = [
   {
     path: '/about',
     name: 'about',
-    component: () => import(/* webpackChunkName: "about" */ '../views/AboutView.vue')
+    component: () => import(/* webpackChunkName: "about" */ '../views/AboutView.vue'),
+    meta: {
+      keepAlive: false // 不需要被缓存
+    }
   },
   {
     path: '/about2',
     name: 'about2',
-    component: () => import(/* webpackChunkName: "about" */ '../views/AboutView.vue')
+    component: () => import(/* webpackChunkName: "about" */ '../views/About2View.vue'),
+    meta: {
+      keepAlive: false // 不需要被缓存
+    }
   }
 ]
 
diff --git a/src/views/About2View.vue b/src/views/About2View.vue
new file mode 100644
index 0000000..28f3639
--- /dev/null
+++ b/src/views/About2View.vue
@@ -0,0 +1,18 @@
+<template>
+  <div class="about">
+    <h1>This is an {{$route.name}} page:</h1>
+    <button>forceRerender</button>
+  </div>
+</template>
+
+<script>
+export default {
+  name: 'About2View',
+  created () {
+    console.log('About2View.vue')
+    console.log(this.$router)
+    console.log(this.$route)
+    console.log(this.$route.path)
+  }
+}
+</script>
diff --git a/src/views/HomeView.vue b/src/views/HomeView.vue
index e8d96d7..2eca718 100644
--- a/src/views/HomeView.vue
+++ b/src/views/HomeView.vue
@@ -13,6 +13,9 @@ export default {
   name: 'HomeView',
   components: {
     HelloWorld
+  },
+  created () {
+    console.log('HomeView.vue')
   }
 }
 </script>
s

組件間溝通


父傳子(props)

diff --git a/src/components/ChildComponent.vue b/src/components/ChildComponent.vue
index e47d61b..7e2b2fe 100644
--- a/src/components/ChildComponent.vue
+++ b/src/components/ChildComponent.vue
@@ -1,12 +1,22 @@
 <template>
   <div class="child">
     ChildComponent
+    <div>{{obj.title}}</div>
+    <div>{{obj.content}}</div>
   </div>
 </template>
 
 <script>
 export default {
-  name: 'ChildComponent'
+  name: 'ChildComponent',
+  props: {
+    obj: {
+      type: Object,
+      default: function () {
+        return {}
+      }
+    }
+  }
 }
 </script>
 
diff --git a/src/views/ParentView.vue b/src/views/ParentView.vue
index adb9021..304371a 100644
--- a/src/views/ParentView.vue
+++ b/src/views/ParentView.vue
@@ -6,7 +6,9 @@
       <div id="right">right<br>right line 2</div>
       <div class="clear"></div>
     </div>
-    <child-component></child-component>
+    <child-component
+      :obj="singleObj"
+    ></child-component>
   </div>
 </template>
 
@@ -16,6 +18,14 @@ import ChildComponent from '@/components/ChildComponent'
 export default {
   name: 'ParentView',
   components: { ChildComponent },
+  data () {
+    return {
+      singleObj: {
+        title: 'props',
+        content: '父傳子'
+      }
+    }
+  },
   created () {
     console.log('ParentView.vue')
   }
s

子傳父(event emitter)


diff --git a/src/components/ChildComponent.vue b/src/components/ChildComponent.vue
index 7e2b2fe..45920ee 100644
--- a/src/components/ChildComponent.vue
+++ b/src/components/ChildComponent.vue
@@ -3,12 +3,18 @@
     ChildComponent
     <div>{{obj.title}}</div>
     <div>{{obj.content}}</div>
+    <button @click="callParent">子傳父</button>
   </div>
 </template>
 
 <script>
 export default {
   name: 'ChildComponent',
+  data () {
+    return {
+      count: 0
+    }
+  },
   props: {
     obj: {
       type: Object,
@@ -16,6 +22,12 @@ export default {
         return {}
       }
     }
+  },
+  methods: {
+    callParent () {
+      this.count++
+      this.$emit('callParentEvent', this.count)
+    }
   }
 }
 </script>
diff --git a/src/views/ParentView.vue b/src/views/ParentView.vue
index 304371a..0b2cfdd 100644
--- a/src/views/ParentView.vue
+++ b/src/views/ParentView.vue
@@ -8,7 +8,9 @@
     </div>
     <child-component
       :obj="singleObj"
+      @callParentEvent="callMe($event)"
     ></child-component>
+    <div>{{parentCount}}</div>
   </div>
 </template>
 
@@ -23,11 +25,18 @@ export default {
       singleObj: {
         title: 'props',
         content: '父傳子'
-      }
+      },
+      parentCount: null
     }
   },
   created () {
     console.log('ParentView.vue')
+  },
+  methods: {
+    callMe (count) {
+      console.log(count)
+      this.parentCount = count
+    }
   }
 }
 </script>
s

<div>{{parentCount}}</div> 

https://stackoverflow.com/a/43858500  Why doesn't the data get updated in Vue Dev Tools?
為什麼Vue Dev Tools裡面的data不更新?
因為頁面沒變,所以加入 <div>{{parentCount}}</div>  把畫面更新,Vue Dev Tools裡面的data才會更新

:key

https://stackoverflow.com/a/51541950  What does the colon represent inside a VueJS/Vuetify/HTML component tag
:key 是 v-bind:key 的簡寫

@符號

https://stackoverflow.com/a/58313986  What does the @ symbol do in Vue.js?
標籤裡的@符號是 v-on 的簡寫


VUEX

版本

"vue": "^2.6.14",
"vuex": "^3.6.2"

設定state


diff --git a/src/store/index.js b/src/store/index.js
index ceffa8e..c0deccd 100644
--- a/src/store/index.js
+++ b/src/store/index.js
@@ -1,17 +1,26 @@
+import { COUNT_MUTATION } from '@/store/mutation-types'
 
 Vue.use(Vuex)
 
 export default new Vuex.Store({
   state: {
+    count: 0
   },
   getters: {
   },
   mutations: {
+    [COUNT_MUTATION] (state, n) {
+      state.count += n
+    }
   },
   actions: {
   },
diff --git a/src/store/mutation-types.js b/src/store/mutation-types.js
new file mode 100644
index 0000000..492a305
--- /dev/null
+++ b/src/store/mutation-types.js
@@ -0,0 +1,2 @@
+export const COUNT_MUTATION = 'COUNT_MUTATION'
diff --git a/src/views/TestView.vue b/src/views/TestView.vue
index 0b2cfdd..e3e3708 100644
--- a/src/views/TestView.vue
+++ b/src/views/TestView.vue
@@ -1,21 +1,27 @@
 <template>
   <div>
     <div>TestView.vue</div>
+    <div @click="increase(1)">increase 1</div>
+    <div @click="increase(2)">increase 2</div>
   </div>
 </template>
 
 <script>
 import ChildComponent from '@/components/ChildComponent'
+import store from '@/store'
 
 export default {
   name: 'TestView',
@@ -36,7 +42,19 @@ export default {
     callMe (count) {
       console.log(count)
       this.parentCount = count
+    },
+    increase (n) {
+      store.commit('COUNT_MUTATION', n)
+    }
   }
 }
 </script>

s

獲取state

通過屬性訪問(store.getters.countInGetters)或mapGetters輔助函數

diff --git a/src/store/index.js b/src/store/index.js
index a0bfcb7..24dff6e 100644
--- a/src/store/index.js
+++ b/src/store/index.js
@@ -8,6 +8,9 @@ export default new Vuex.Store({
     count: 0
   },
   getters: {
+    countInGetters (state) {
+      return state.count
+    }
   },
   mutations: {
     increment (state, n) {
diff --git a/src/views/TestView.vue b/src/views/TestView.vue
index 3b4e0b9..3e8272f 100644
--- a/src/views/TestView.vue
+++ b/src/views/TestView.vue
@@ -14,12 +14,14 @@
     <div>{{parentCount}}</div>
     <div @click="increase(1)">increase 1</div>
     <div @click="increase(2)">increase 2</div>
+    <div @click="testGetter()">test</div>
   </div>
 </template>
 
 <script>
 import ChildComponent from '@/components/ChildComponent'
 import store from '@/store'
+import { mapGetters } from 'vuex'
 
 export default {
   name: 'TestView',
@@ -43,7 +45,16 @@ export default {
     },
     increase (n) {
       store.commit('increment', n)
+    },
+    testGetter () {
+      console.log(store.getters.countInGetters)
+      console.log(this.countInGetters)
     }
+  },
+  computed: {
+    ...mapGetters([
+      'countInGetters'
+    ])
   }
 }
 </script>

s

createLogger 插件

diff --git a/src/store/index.js b/src/store/index.js
index 24dff6e..c856f10 100644
--- a/src/store/index.js
+++ b/src/store/index.js
@@ -1,5 +1,5 @@
 import Vue from 'vue'
-import Vuex from 'vuex'
+import Vuex, { createLogger } from 'vuex'
 
 Vue.use(Vuex)
 
@@ -20,5 +20,6 @@ export default new Vuex.Store({
   actions: {
   },
   modules: {
-  }
+  },
+  plugins: [createLogger()]
 })

s

lodash

檢查object有沒有key

https://stackoverflow.com/a/43096892  Checking if a key exists in a JavaScript object?
vue 2 內建lodash,直接import

diff --git a/src/views/TestView.vue b/src/views/TestView.vue
index e3e3708..79024b7 100644
--- a/src/views/TestView.vue
+++ b/src/views/TestView.vue
@@ -22,6 +22,7 @@
 import ChildComponent from '@/components/ChildComponent'
 import store from '@/store'
 import { mapGetters } from 'vuex'
+import _ from 'lodash'
 
 export default {
   name: 'TestView',
@@ -32,11 +33,26 @@ export default {
         title: 'props',
         content: '父傳子'
       },
-      parentCount: null
+      parentCount: null,
+      todos: [
+        {
+          id: 1,
+          text: 'text 1',
+          done: true
+        },
+        {
+          id: 2,
+          text: 'text 2',
+          done: false
+        }
+      ]
     }
   },
   created () {
     console.log('TestView.vue')
+    console.log(_.get(this.todos, '0.text')) // text 1
+    console.log(_.get(this.todos, '1.id')) // 2
+    console.log(_.get(this.todos, '2.id')) // undefined
   },
   methods: {
     callMe (count) {

s

彈窗modal

使用到的特性:組件,prop 傳遞,插槽 (slot),過渡 (transitions)
https://vuejs.org/examples/#modal  Modal with Transitions

或是直接用現成插件 vue2-simplert-plugin 或 mint-ui的Message box


ModalComponent.vue

<template>
  <Transition name="modal">
    <div v-if="show" class="modal-mask">
      <div class="modal-wrapper">
        <div class="modal-container">
          <div class="modal-header">
            <slot name="header">default header</slot>
          </div>

          <div class="modal-body">
            <slot name="body">default body</slot>
          </div>

          <div class="modal-footer">
            <slot name="footer">
              default footer
              <button
                class="modal-default-button"
                @click="$emit('close')"
              >OK
              </button>
            </slot>
          </div>
        </div>
      </div>
    </div>
  </Transition>
</template>

<script>
export default {
  name: 'ModalComponent',
  props: {
    show: Boolean
  }
}
</script>

<style scoped>
.modal-mask {
  position: fixed;
  z-index: 9998;
  top: 0;
  left: 0;
  width: 100%;
  height: 100%;
  background-color: rgba(0, 0, 0, 0.5);
  display: table;
  transition: opacity 0.3s ease;
}

.modal-wrapper {
  display: table-cell;
  vertical-align: middle;
}

.modal-container {
  width: 300px;
  margin: 0px auto;
  padding: 20px 30px;
  background-color: #fff;
  border-radius: 2px;
  box-shadow: 0 2px 8px rgba(0, 0, 0, 0.33);
  transition: all 0.3s ease;
}

.modal-header h3 {
  margin-top: 0;
  color: #42b983;
}

.modal-body {
  margin: 20px 0;
}

.modal-default-button {
  float: right;
}

/*
 * The following styles are auto-applied to elements with
 * transition="modal" when their visibility is toggled
 * by Vue.js.
 *
 * You can easily play with the modal transition by editing
 * these styles.
 */

.modal-enter-from {
  opacity: 0;
}

.modal-leave-to {
  opacity: 0;
}

.modal-enter-from .modal-container,
.modal-leave-to .modal-container {
  -webkit-transform: scale(1.1);
  transform: scale(1.1);
}
</style>

s
name: 'ModalComponent',  組件名字必須是多個單字,否則要在 .eslintrc.js 加入  'vue/multi-word-component-names': 'off'
https://stackoverflow.com/a/72144014  Component name "Temp" should always be multi-word vue/multi-word-component-names
<slot name="header">default header</slot>  組件內的具名插槽


TestView.vue

diff --git a/src/views/TestView.vue b/src/views/TestView.vue
index d9c5d70..b79c879 100644
--- a/src/views/TestView.vue
+++ b/src/views/TestView.vue
@@ -12,9 +12,28 @@
       @callParentEvent="callMe($event)"
     ></child-component>
     <div>{{parentCount}}</div>
+    <button id="show-modal" @click="showModal = true">Show Modal</button>
+    <!-- use the modal component, pass in the prop -->
+    <modal-component :show="showModal" @close="showModal = false">
+      <template v-slot:header>
+        <h3>custom header1,  {{ slotProps.user.firstName }}</h3>
+      </template>
+    </modal-component>
   </div>
 </template>
 
@@ -23,10 +42,14 @@ import ChildComponent from '@/components/ChildComponent'
 import store from '@/store'
 import { mapGetters } from 'vuex'
 import _ from 'lodash'
+import ModalComponent from '@/components/ModalComponent'
 
 export default {
   name: 'TestView',
+  components: {
+    ModalComponent
+  },
   data () {
     return {
       singleObj: {
@@ -45,7 +68,15 @@ export default {
           text: 'text 2',
           done: false
         }
-      ]
+      ],
+      showModal: false
     }
   },
   created () {

s
具名插槽 v-slot:header 可簡寫成 #header (WebStorm都會自動提示插槽名)。slot="header"是2.6.0 起被廢棄的寫法


.eslintrc.js

允許空白行

   rules: {
+    'no-trailing-spaces': 'off',


其他語法

v-if和v-else不要html標籤

https://stackoverflow.com/a/49218055  How to use v-if and v-else without any html tag or else
<template v-if="condition">
</template>
<template v-else>
</template>

倒計時

https://stackoverflow.com/a/59923858  How do I create a simple 10 seconds countdown in Vue.js
<template>
    {{ timerCount }}
</template>
<script>
    export default {
        data() {
            return {
                timerCount: 30
            }
        },
        watch: {
            timerCount: {
                handler(value) {
                    if (value > 0) {
                        setTimeout(() => {
                            this.timerCount--;
                        }, 1000);
                    }
                },
                immediate: true // This ensures the watcher is triggered upon creation
            }
        }
    }
</script>
s


2022年5月11日 星期三

低版本PHP的XDebug

PHP 5.6

Windows

php_xdebug-2.5.5-5.6-vc11-nts-x86_64.dll

Windows 10 + 寶塔php 5.6 + 【PHP 5.6 VC11 (64 bit)】 + PHPStorm 2021.2.2

C:\BtSoft\php\56\php.ini
[XDebug]
zend_extension="C:\BtSoft\php\56\ext\php_xdebug-2.5.5-5.6-vc11-nts-x86_64.dll"
xdebug.remote_enable=1
xdebug.remote_host=127.0.0.1
xdebug.remote_log="C:\BtSoft\php\56\xdebug_log"

可斷點

Linux

CentOS 7.9 + 寶塔php 5.6 + XDebug 2.5.5 + PHPStorm 2021.2.2

/www/server/php/56/etc/php.ini
[xdebug]
zend_extension=/www/server/php/56/lib/php/extensions/no-debug-non-zts-20131226/xdebug.so
xdebug.remote_enable=1
xdebug.remote_host=192.168.1.x
xdebug.remote_log=/tmp/xdebug_log

可斷點

PHP 5.5

Windows

php_xdebug-2.5.5-5.5-vc11-nts-x86_64.dll

Windows 10 + 寶塔php 5.5 + 【PHP 5.5 VC11 (64 bit)】 + PHPStorm 2021.2.2

C:\BtSoft\php\55\php.ini
[XDebug]
zend_extension="C:\BtSoft\php\55\ext\php_xdebug-2.5.5-5.5-vc11-nts-x86_64.dll"
xdebug.remote_enable=1
xdebug.remote_host=127.0.0.1

可斷點

Linux

CentOS 7.9 + 寶塔php 5.5 + XDebug 2.5.5 + PHPStorm 2021.2.2

/www/server/php/55/etc/php.ini
[xdebug]
zend_extension="/www/server/php/55/lib/php/extensions/no-debug-non-zts-20121212/xdebug.so"
xdebug.remote_enable=1
xdebug.remote_host=192.168.1.x

可斷點

安裝xdebug時不要在用過裝PHP 5.6的 xdebug-2.5.5/ 目錄下編譯安裝,重新解壓縮新的 xdebug-2.5.5/ 目錄安裝。否則重啟PHP 5.5時會報錯:Xdebug requires Zend Engine API version 220131226.
The Zend Engine API version 220121212 which is installed, is outdated.

PHP 5.4

Windows

php_xdebug-2.4.1-5.4-vc9-nts-x86_64.dll

Windows 10 + 寶塔php 5.4 + 【PHP 5.4 VC9 (64 bit)】 + PHPStorm 2021.2.2
phpinfo() 吃不到XDebug擴展

不能斷點


php_xdebug-2.4.1-5.4-vc9-nts.dll

Windows 10 + 寶塔php 5.4 + 【PHP 5.4 VC9 (32 bit)】 + PHPStorm 2021.2.2
phpinfo() 吃得到XDebug擴展,但是xdebug_log 報錯
<- eval -i 10 -- aXNzZXQoJF9TRVJWRVJbJ1BIUF9JREVfQ09ORklHJ10p
-> <response xmlns="urn:debugger_protocol_v1" xmlns:xdebug="http://xdebug.org/dbgp/xdebug" command="eval" transaction_id="10"><error code="5"><message><![CDATA[command is not available]]></message></error></response>

不能斷點

Linux

CentOS 7.9 + 寶塔php 5.4 + XDebug 2.4.1 + PHPStorm 2021.2.2

/www/server/php/54/etc/php.ini
[xdebug]
zend_extension="/www/server/php/54/lib/php/extensions/no-debug-non-zts-20100525/xdebug.so"
xdebug.remote_enable=1
xdebug.remote_host=192.168.1.x

可斷點

PHP 5.4 在Windows 10 斷點不了,只能在CentOS上斷。
結論:不要接手Windows的PHP 5.4以下專案


2022年3月16日 星期三

快速移動工作視窗/分頁

移動視窗到另外一個屏幕

Windows + Shift + Left Arrow - 移動當前視窗到左邊
Windows + Shift + Right Arrow - 移動當前視窗到右邊

Sublime

https://superuser.com/a/971603  Sublime Text, move tabs with keyboard
安裝 MoveTab 插件 
Ctrl+Shift+PgUp - 將當前tab往左移
Ctrl+Shift+PgDn - 將當前tab往右移

Chrome

https://superuser.com/a/730415  Keyboard shortcuts to arrange Chrome tabs on Windows?
安裝 Rearrange Tabs 插件,然後在 chrome://extensions/shortcuts 中設定熱鍵
Ctrl+Shift+PgUp - 將當前tab往左移
Ctrl+Shift+PgDn - 將當前tab往右移


PHPStorm / WebStorm

https://stackoverflow.com/a/54210051  Intellij: Move tab left and right
安裝 TabMover 插件
Control+Alt+Shift+Left Arrow - 往左移動tab
Control+Alt+Shift+Right Arrow - 往右移動tab
Control+Alt+Shift+Up Arrow - 移動tab到第一個
Control+Alt+Shift+Down Arrow - 移動tab到最後一個

Tabby

是的,我放棄了使用 ConEmu64 來當做 git bash 的Tab解決方案,轉向了Tabby 。為了更舒服的工作體驗

安裝

無難度,下載官網中 github 上的的 tabby-1.0.173-setup.exe 安裝檔

配置

Terminal 

Terminal => Startup => 關閉 Restore terminal tabs on app start (因為我們後面要使用 Workspace Manager 插件管理頁簽)

Profiles & connections

在Git-Bash的profile上複製出一個自己的bash(Git-Bash-user),可客製化起始路徑


Hotkeys

Next Tab 新增 Ctrl+PageDown
Previous Tab 新增 Ctrl+PageUp

Tab 1 新增 Ctr+1
Tab 2 新增 Ctr+2
Tab 3 新增 Ctr+3
Tab 4 新增 Ctr+4
Tab 5 新增 Ctr+5
Tab 6 新增 Ctr+6
Tab 7 新增 Ctr+7
Tab 8 新增 Ctr+8
Tab 9 新增 Ctr+9
Tab 10 新增 Ctr+0

New Tab: Git-Bash-user 新增 Ctrl+T

Move tab to the left - Ctrl+Shift+PageUp
Move tab to the right - Ctrl+Shift+PageDown
(預設的,不用設置)


Plugins

搜尋安裝workspace-manager

Workspace manager

新增配置,設定tab路徑,參考github上的範例,點擊Open config file可以找到 workspace-config.yaml 配置文件。選中你新增的配置然後啟用Run as startup
例:
- title: workerman-chat
  color: '#03fccf'
  commands:
     - cd /c/projects/127.0.0.1/workerman-chat
- title: blog.example.com
  color: '#fc036b'
  commands:
     - cd /c/projects/127.0.0.1/blog.example.com
- title: bagisto
  color: '#302a57'
  commands:
     - cd /c/projects/127.0.0.1/bagisto

ps. Tab 的顏色可以在 https://htmlcolorcodes.com/ 這裡找色碼
重啟tabby後會自動打開設定中的tabs

supervisor

透過Tabby 和 Workspace manager 的腳本執行 php artisan queue:listen 可以在windows替代supervisor,可惜tabby還不能像chrome一樣把tab拉到一個新window去


2022年2月4日 星期五

電腦上拼接長圖

前言

iPhone手機上可以使用【長圖拼接】APP將高度過長的網頁拼接成一張圖,那麼如何在windows電腦上實現長圖拼接?


準備工具

小畫家(Photoshop也能辦到,但是太折騰) + chrome的FireShot

當然以下範例可以使用FireShot的【截取整個頁面】輕鬆完成,但是如果有FireShot不能處理的情況,如欲截取的內容為彈窗。可使用以下方法

開始

以yahoo新聞為例

從頂部截取第一張圖

FireShot => 截取可見部分

截取第二張圖

網頁往下拉至上一張圖的尾端 => FireShot => 截取可見部分


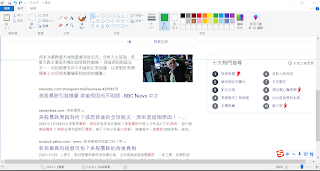
打開小畫家

檔案=> 調整檔案大小 => (調整大小)像素 => 取消勾選【維持外觀比例】 => 垂直:調整成一個比較大的值

因為yahoo新聞背景是白色的,所以我們先對原本的背景上色,讓之後裁剪時比較好處理


複製第一張圖片至小畫家

在小畫家中直接ctrl + v 貼上


複製第二張圖片至小畫家

一樣在 FireShot Capture頁簽裡面複製圖片,然後在小畫家中移動到第一張圖片的尾部


ctrl+v貼上

貼上後保持第二張圖片的選取狀態,然後使用鍵盤的上下左右(↑↓←→)去調整第二張圖到適合的位置

剪裁

檢視 => 縮小(直到適合剪裁的大小)

常用 => 選取:適合的大小 (在之前有設定底色,這步驟會比較好選取)

裁剪

然後在小畫家裡面把他保存成png


總結

雖然在細節處理上不如Photoshop,但是方法簡單粗暴,而且不需要安裝特殊的工具(小畫家windows系統內建,chrome更是每個電腦必備,FireShot插件安裝無壓力)