概覽
frp是內網穿透的反向代理工具,支持多種服務(HTTP、SSH、RDP),需要準備一台VPS
相關連接
文檔
下載
服務器
查CPU型號(AMD、Intel、ARM)
# grep -i core /proc/cpuinfo
model name : AMD EPYC 7601 32-Core Processor
下載、解壓縮、進入目錄
# wget https://github.com/fatedier/frp/releases/download/v0.36.2/frp_0.36.2_linux_amd64.tar.gz
# tar zxvf frp_0.36.2_linux_amd64.tar.gz
# cd frp_0.36.2_linux_amd64/
編輯 frps.ini
[common]
# frp监听的端口,默认是7000,可以改成其他的
bind_port = 7000
# 授权码,请改成更复杂的
token = 12345678
# HTTP 类型代理监听的端口
vhost_http_port = 8080
# frpc 設置 tls_enable = true 才能連,連線做tls加密
tls_only = true
# tls_trusted_ca_file 内容是有效的话,客戶端要配置tls_cert_file和tls_key_file 才能連
tls_trusted_ca_file = /frp_tls_files/ca.crt

# frp管理后台端口,请按自己需求更改
dashboard_port = 7500
# frp管理后台用户名和密码,请改成自己的
dashboard_user = admin
dashboard_pwd = admin
enable_prometheus = true
# 二级域名后缀
subdomain_host = yourdomain.com

# frp日志配置
log_file = /var/log/frps.log
log_level = info
log_max_days = 3
s
設置和啟動frp服務
在frp目錄下執行
mkdir -p /etc/frp
cp frps.ini /etc/frp
cp frps /usr/bin
cp systemd/frps.service /usr/lib/systemd/system/
systemctl enable frps
systemctl start frps
s
防火墻放行端口
# 添加监听端口
firewall-cmd --permanent --add-port=7000/tcp
# 添加管理后台端口
firewall-cmd --permanent --add-port=7500/tcp
firewall-cmd --reload
s
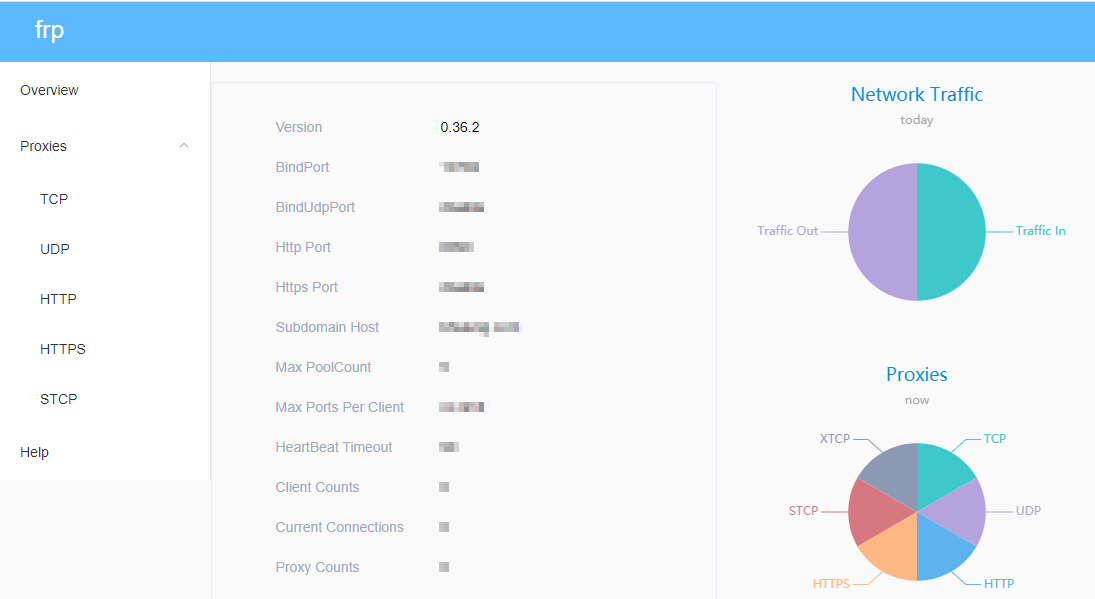
訪問frp後台
瀏覽器打開"http://服務器IP:後台管理端口" ,輸入用戶名和密碼可以查看連接狀態:
客戶端
下載frp
到 https://github.com/fatedier/frp/releases ,下載最新版客戶端
windows:32位系統 frp_0.36.2_windows_386.zip ,64位系統 frp_0.36.2_windows_amd64.zip ,不知道系統多少下載32位
解壓縮下載的壓縮包,進入文件夾內
編輯 frpc.ini
(提供服務的遠程電腦)
# 服务端配置
[common]
server_addr = 服务器ip
# 请换成设置的服务器端口
server_port = 7000
token = 12345678
# 自定义 TLS 协议加密
tls_enable = true
tls_cert_file = C:\frp_tls_files\client.crt
tls_key_file = C:\frp_tls_files\client.key

# 配置http服务,可用于小程序开发、远程调试等
[web]
type = http
local_ip = 127.0.0.1
local_port = 80
subdomain = win
# 将 frpc 与 frps 之间的通信内容加密传输,将会有效防止传输内容被截取。
use_encryption = true
# 对传输内容进行压缩,可以有效减小 frpc 与 frps 之间的网络流量,加快流量转发速度,但是会额外消耗一些 CPU 资源。
use_compression = true
# 设置 BasicAuth 鉴权
http_user = abc
http_pwd = abc

# 配置遠程桌面服務
[secret_rdp]
# stcp(secret tcp) 类型的代理可以避免让任何人都能访问到要穿透的服务,但是访问者也需要运行另外一个 frpc 客户端。
type = stcp
# 只有 sk 一致的用户才能访问到此服务
sk = abcdefg
local_ip = 127.0.0.1
local_port = 3389
use_encryption = true
use_compression = true
s
ps.
1. 一個服務端可以同時給多個客戶端使用
2. [ssh]這樣的名稱必須全局唯一,即就算有多個客戶端,也只能使用一次,其他的可以用[ssh2]、[ssh3]等;
3. 除了type為http/https,端口只能被一個服務使用
客戶端連上服務端
git bash 進入frp目錄,然後執行
$ ./frpc.exe -c frpc.ini
後台查狀態
登錄frp管理後台,應該可以看到客戶端已經連上來了

firewalld
firewalld 啟動失敗
原本用iptables,要改用firewalld,但是 firewalld 啟動失敗
# systemctl start firewalld
Failed to start firewalld.service: Unit is masked.
解法
# systemctl unmask --now firewalld
Removed symlink /etc/systemd/system/firewalld.service.
# systemctl enable firewalld
Created symlink from /etc/systemd/system/dbus-org.fedoraproject.FirewallD1.service to /usr/lib/systemd/system/firewalld.service.
Created symlink from /etc/systemd/system/basic.target.wants/firewalld.service to /usr/lib/systemd/system/firewalld.service.
# systemctl start firewalld
檢查 firewalld 設定
使用 --list-all 檢查
# firewall-cmd --list-all
查可用的zones
# firewall-cmd --get-zones
查預設的zone
# firewall-cmd --get-default-zone
public
查當前zone開放的端口
# firewall-cmd --list-ports
新增可用的端口
# firewall-cmd --add-port=port-number/port-type
如:
# firewall-cmd --add-port=8080/tcp
讓新的設定永久生效
# firewall-cmd --runtime-to-permanent
openssl升級
因為使用到證書登錄,證書登錄用到了openssl,但是openssl舊版有 Heartbleed bug 如果你的openssl太舊,需要升級openssl,到 https://www.openssl.org/source/ 下載最新的openssl
安裝
# wget https://www.openssl.org/source/openssl-1.1.1k.tar.gz
# tar zxf openssl-1.1.1k.tar.gz
# cd openssl-1.1.1k/
# ./config
# make
# make test
# make install
測試新裝的openssl
# /usr/local/bin/openssl version
/usr/local/bin/openssl: error while loading shared libraries: libssl.so.1.1: cannot open shared object file: No such file or directory
解法
# ln -s /usr/local/lib64/libssl.so.1.1 /usr/lib64/
# ln -s /usr/local/lib64/libcrypto.so.1.1 /usr/lib64/
再次測試
# /usr/local/bin/openssl version
OpenSSL 1.1.1k 25 Mar 2021
替換新舊版本
# mv /usr/bin/openssl /usr/bin/openssl-old
# ln -s /usr/local/bin/openssl /usr/bin/openssl
# openssl version
OpenSSL 1.1.1k 25 Mar 2021
自定義 TLS 協議加密
生成服務器私鑰
# openssl genrsa -out ca.key 1024
Generating RSA private key, 1024 bit long modulus (2 primes)
.....+++++
.......+++++
e is 65537 (0x010001)
# ls
ca.key
根據私鑰生成證書申請文件csr
# openssl req -new -key ca.key -out ca.csr
You are about to be asked to enter information that will be incorporated
into your certificate request.
What you are about to enter is what is called a Distinguished Name or a DN.
There are quite a few fields but you can leave some blank
For some fields there will be a default value,
If you enter '.', the field will be left blank.
-----
Country Name (2 letter code) [AU]:CN
State or Province Name (full name) [Some-State]:Shanghai
Locality Name (eg, city) []:Shanghai
Organization Name (eg, company) [Internet Widgits Pty Ltd]:JY
Organizational Unit Name (eg, section) []:JY
Common Name (e.g. server FQDN or YOUR name) []:*.yourdomain.com # 這裡輸入你的域名,*.yourdomain.com生成通配符域名證書
Email Address []:yourname@email.com
Please enter the following 'extra' attributes
to be sent with your certificate request
A challenge password []: # 這裡輸入密碼,沒有密碼可以空
An optional company name []:JY
# ls
ca.csr ca.key
私鑰對證書申請進行簽名從而生成證書
# openssl x509 -req -in ca.csr -out ca.crt -signkey ca.key -days 3650
Signature ok
subject=C = CN, ST = Shanghai, L = Shanghai, O = JY, OU = JY, CN = *.yourdomain.com, emailAddress = yourname@email.com
Getting Private key
# ls
ca.crt ca.csr ca.key
生成 frpc 的私鑰
# openssl genrsa -out client.key 2048
Generating RSA private key, 2048 bit long modulus (2 primes)
..........+++++
................................................+++++
e is 65537 (0x010001)
# ls
ca.crt ca.csr ca.key client.key
準備默認 OpenSSL 配置文件於當前目錄
# cp /etc/pki/tls/openssl.cnf ./my-openssl.cnf
# ls
ca.crt ca.csr ca.key client.key my-openssl.cnf
根據frpc的私鑰生成frpc的證書申請文件csr
# openssl req -new -sha256 -key client.key \
> -subj "/C=XX/ST=DEFAULT/L=DEFAULT/O=DEFAULT/CN=client.com" \
> -reqexts SAN \
> -config <(cat my-openssl.cnf <(printf "\n[SAN]\nsubjectAltName=DNS:client.com,DNS:example.client.com")) \
> -out client.csr
# ls
ca.crt ca.csr ca.key client.csr client.key my-openssl.cnf
ps. 使用 client.com 沒事,即使這是無效的域名,不影響使用
生成 frpc 的證書(用到ca.crt和ca.key)
# openssl x509 -req -days 365 \
> -in client.csr -CA ca.crt -CAkey ca.key -CAcreateserial \
> -extfile <(printf "subjectAltName=DNS:client.com,DNS:example.client.com") \
> -out client.crt
Signature ok
subject=C = XX, ST = DEFAULT, L = DEFAULT, O = DEFAULT, CN = client.com
Getting CA Private Key
# ls
ca.crt ca.csr ca.key ca.srl client.crt client.csr client.key my-openssl.cnf
當 服務器的frps.ini 配置的 tls_trusted_ca_file 是有效的 ca.crt 時,客戶端frpc.ini 的 tls_cert_file 和 tls_key_file 必須是有效的 client.crt 和 client.key 。完成frps 單向驗證 frpc 的身份
nginx反向代理frp後台
因為cloudflare免費的只能代理80端口,想要用cloudflare的https訪問frp後台,可以這樣做
nginx新增配置:
server
{
    server_name  frp.yourdomain.com;

    location / {
        proxy_pass         http://127.0.0.1:7500;
        proxy_set_header   Host             $host;
        proxy_set_header   X-Real-IP        $remote_addr;
        proxy_set_header   X-Forwarded-For  $proxy_add_x_forwarded_for;
    }
}
s
在想要訪問內網服務的機器上也部署 frpc
frpc.ini配置如下:
# 服务端配置
[common]
(同提供服務的遠程電腦的frpc.ini)

[secret_ssh_visitor]
type = stcp
# stcp 的访问者
role = visitor
# 要访问的 stcp 代理的名字
server_name = secret_rdp
sk = abcdefg
# 绑定本地端口用于访问 SSH 服务
bind_addr = 127.0.0.1
bind_port = 13389
s
訪問內網穿透服務
web
提供服務的遠程電腦打開web服務,外網任意一台電腦可直接訪問 https://win.yourdomain.com/ ,即使遠程電腦的web服務
secret_rdp
外網電腦打開Windows 遠端桌面連線,輸入 127.0.0.1:13389 就可以連接到本地Windows
注意一定要開啟windows電腦的【啟用遠端桌面】
將 frp 封裝成 windows 後台服務
使用 NSSM 將 frp 封裝成 windows 服務,可以在後台運行,並且開機自啟動
安裝nssm且新增frpc服務
下載 nssm 2.24 後解壓縮,(打開git bash)進入 nssm-2.24 目錄
/path/nssm-2.24/win64
$ ./nssm.exe install frpc
Administrator access is needed to install a service.
在彈出的對話框中填寫

Path: C:\path\frp_0.36.2_windows_386\frpc.exe
Startup directory: C:\path\frp_0.36.2_windows_386
Arguments: -c C:\path\frp_0.36.2_windows_386\frpc.ini
Details頁簽可以設定是否開機(Startup type)自動啟動:automatic / manual
編輯服務配置
$ ./nssm.exe edit frpc
啟動和停止
用命令【啟動】和【停止】實際測試無效
$ ./nssm.exe start frpc
Can't open service!
OpenService(): 存取被拒。
$ ./nssm.exe stop frpc
Can't open service!
OpenService(): 存取被拒。
要用這方式停止
運行 services.msc ,可以打開 windows 的服務管理器。在這裡面手動停用/啟動

刪除服務
$ ./nssm.exe remove frpc
Administrator access is needed to remove a service.
參考資料
https://www.vpsjxw.com/vps_use/vps_frp_intro/ vps+frp内网穿透,外网远程访问局域网内主机的ssh、远程桌面、网站服务
https://tlanyan.me/frp-tunnel-tutorial/ frp内网穿透教程(主要)
https://bobcares.com/blog/failed-to-start-firewalld-service-unit-is-masked/ Failed to start firewalld service unit is masked – How we fix it!
https://docs.fedoraproject.org/en-US/quick-docs/firewalld/ Using firewalld
https://gist.github.com/lorne-luo/8c05a90d19aeaa653ac4dfd66f534307 upgrade openssl on centos 7
https://www.4spaces.org/how-to-upgrade-openssl-on-centos-7/ CentOS如何升级openssl到最新版本
https://ningyu1.github.io/site/post/51-ssl-cert/ Openssl生成自签名证书,简单步骤
https://wlxyzxyz.com/post/nginx%E5%8F%8D%E5%90%91%E4%BB%A3%E7%90%86%E5%85%B6%E4%BB%96%E7%AB%AF%E5%8F%A3%E6%9C%8D%E5%8A%A1.html nginx反向代理其他端口服务
https://www.sohu.com/a/416379503_610671 教你用FRP做内网穿透 使用远程桌面连接家里的windows电脑
https://shenbo.github.io/2019/02/27/apps/frp%E9%85%8D%E7%BD%AE%E5%86%85%E7%BD%91%E7%A9%BF%E9%80%8F%E3%80%81%E9%80%9A%E8%BF%87rdp%E8%BF%9C%E7%A8%8B%E6%A1%8C%E9%9D%A2%E6%8E%A7%E5%88%B6windows%E7%B3%BB%E7%BB%9F/ frp配置内网穿透、通过rdp远程桌面控制windows系统
