顯示具有 windows 10 標籤的文章。 顯示所有文章

2022年6月30日 星期四

ScreenToGif

安裝

Microsoft Store 直接安裝

使用

打開應用程式後

螢幕錄影

調整大小,開始錄影,停止


編輯

播放,減少影格數(2次),刪除前面所有影格,刪除後面所有影格

圖片

多選影格,效果(像素化),形狀

保存(ctrl+s)

可輸出gif或影片


結果


輸出影片需設定FFmpeg路徑


下載FFmpeg


解壓縮,設定環境變量(Path),然後就能輸出影片(mp4)


2022年5月11日 星期三

低版本PHP的XDebug

PHP 5.6

Windows

php_xdebug-2.5.5-5.6-vc11-nts-x86_64.dll

Windows 10 + 寶塔php 5.6 + 【PHP 5.6 VC11 (64 bit)】 + PHPStorm 2021.2.2

C:\BtSoft\php\56\php.ini
[XDebug]
zend_extension="C:\BtSoft\php\56\ext\php_xdebug-2.5.5-5.6-vc11-nts-x86_64.dll"
xdebug.remote_enable=1
xdebug.remote_host=127.0.0.1
xdebug.remote_log="C:\BtSoft\php\56\xdebug_log"

可斷點

Linux

CentOS 7.9 + 寶塔php 5.6 + XDebug 2.5.5 + PHPStorm 2021.2.2

/www/server/php/56/etc/php.ini
[xdebug]
zend_extension=/www/server/php/56/lib/php/extensions/no-debug-non-zts-20131226/xdebug.so
xdebug.remote_enable=1
xdebug.remote_host=192.168.1.x
xdebug.remote_log=/tmp/xdebug_log

可斷點

PHP 5.5

Windows

php_xdebug-2.5.5-5.5-vc11-nts-x86_64.dll

Windows 10 + 寶塔php 5.5 + 【PHP 5.5 VC11 (64 bit)】 + PHPStorm 2021.2.2

C:\BtSoft\php\55\php.ini
[XDebug]
zend_extension="C:\BtSoft\php\55\ext\php_xdebug-2.5.5-5.5-vc11-nts-x86_64.dll"
xdebug.remote_enable=1
xdebug.remote_host=127.0.0.1

可斷點

Linux

CentOS 7.9 + 寶塔php 5.5 + XDebug 2.5.5 + PHPStorm 2021.2.2

/www/server/php/55/etc/php.ini
[xdebug]
zend_extension="/www/server/php/55/lib/php/extensions/no-debug-non-zts-20121212/xdebug.so"
xdebug.remote_enable=1
xdebug.remote_host=192.168.1.x

可斷點

安裝xdebug時不要在用過裝PHP 5.6的 xdebug-2.5.5/ 目錄下編譯安裝,重新解壓縮新的 xdebug-2.5.5/ 目錄安裝。否則重啟PHP 5.5時會報錯:Xdebug requires Zend Engine API version 220131226.
The Zend Engine API version 220121212 which is installed, is outdated.

PHP 5.4

Windows

php_xdebug-2.4.1-5.4-vc9-nts-x86_64.dll

Windows 10 + 寶塔php 5.4 + 【PHP 5.4 VC9 (64 bit)】 + PHPStorm 2021.2.2
phpinfo() 吃不到XDebug擴展

不能斷點


php_xdebug-2.4.1-5.4-vc9-nts.dll

Windows 10 + 寶塔php 5.4 + 【PHP 5.4 VC9 (32 bit)】 + PHPStorm 2021.2.2
phpinfo() 吃得到XDebug擴展,但是xdebug_log 報錯
<- eval -i 10 -- aXNzZXQoJF9TRVJWRVJbJ1BIUF9JREVfQ09ORklHJ10p
-> <response xmlns="urn:debugger_protocol_v1" xmlns:xdebug="http://xdebug.org/dbgp/xdebug" command="eval" transaction_id="10"><error code="5"><message><![CDATA[command is not available]]></message></error></response>

不能斷點

Linux

CentOS 7.9 + 寶塔php 5.4 + XDebug 2.4.1 + PHPStorm 2021.2.2

/www/server/php/54/etc/php.ini
[xdebug]
zend_extension="/www/server/php/54/lib/php/extensions/no-debug-non-zts-20100525/xdebug.so"
xdebug.remote_enable=1
xdebug.remote_host=192.168.1.x

可斷點

PHP 5.4 在Windows 10 斷點不了,只能在CentOS上斷。
結論:不要接手Windows的PHP 5.4以下專案


2022年3月16日 星期三

快速移動工作視窗/分頁

移動視窗到另外一個屏幕

Windows + Shift + Left Arrow - 移動當前視窗到左邊
Windows + Shift + Right Arrow - 移動當前視窗到右邊

Sublime

https://superuser.com/a/971603  Sublime Text, move tabs with keyboard
安裝 MoveTab 插件 
Ctrl+Shift+PgUp - 將當前tab往左移
Ctrl+Shift+PgDn - 將當前tab往右移

Chrome

https://superuser.com/a/730415  Keyboard shortcuts to arrange Chrome tabs on Windows?
安裝 Rearrange Tabs 插件,然後在 chrome://extensions/shortcuts 中設定熱鍵
Ctrl+Shift+PgUp - 將當前tab往左移
Ctrl+Shift+PgDn - 將當前tab往右移


PHPStorm / WebStorm

https://stackoverflow.com/a/54210051  Intellij: Move tab left and right
安裝 TabMover 插件
Control+Alt+Shift+Left Arrow - 往左移動tab
Control+Alt+Shift+Right Arrow - 往右移動tab
Control+Alt+Shift+Up Arrow - 移動tab到第一個
Control+Alt+Shift+Down Arrow - 移動tab到最後一個

Tabby

是的,我放棄了使用 ConEmu64 來當做 git bash 的Tab解決方案,轉向了Tabby 。為了更舒服的工作體驗

安裝

無難度,下載官網中 github 上的的 tabby-1.0.173-setup.exe 安裝檔

配置

Terminal 

Terminal => Startup => 關閉 Restore terminal tabs on app start (因為我們後面要使用 Workspace Manager 插件管理頁簽)

Profiles & connections

在Git-Bash的profile上複製出一個自己的bash(Git-Bash-user),可客製化起始路徑


Hotkeys

Next Tab 新增 Ctrl+PageDown
Previous Tab 新增 Ctrl+PageUp

Tab 1 新增 Ctr+1
Tab 2 新增 Ctr+2
Tab 3 新增 Ctr+3
Tab 4 新增 Ctr+4
Tab 5 新增 Ctr+5
Tab 6 新增 Ctr+6
Tab 7 新增 Ctr+7
Tab 8 新增 Ctr+8
Tab 9 新增 Ctr+9
Tab 10 新增 Ctr+0

New Tab: Git-Bash-user 新增 Ctrl+T

Move tab to the left - Ctrl+Shift+PageUp
Move tab to the right - Ctrl+Shift+PageDown
(預設的,不用設置)


Plugins

搜尋安裝workspace-manager

Workspace manager

新增配置,設定tab路徑,參考github上的範例,點擊Open config file可以找到 workspace-config.yaml 配置文件。選中你新增的配置然後啟用Run as startup
例:
- title: workerman-chat
  color: '#03fccf'
  commands:
     - cd /c/projects/127.0.0.1/workerman-chat
- title: blog.example.com
  color: '#fc036b'
  commands:
     - cd /c/projects/127.0.0.1/blog.example.com
- title: bagisto
  color: '#302a57'
  commands:
     - cd /c/projects/127.0.0.1/bagisto

ps. Tab 的顏色可以在 https://htmlcolorcodes.com/ 這裡找色碼
重啟tabby後會自動打開設定中的tabs

supervisor

透過Tabby 和 Workspace manager 的腳本執行 php artisan queue:listen 可以在windows替代supervisor,可惜tabby還不能像chrome一樣把tab拉到一個新window去


2022年2月4日 星期五

電腦上拼接長圖

前言

iPhone手機上可以使用【長圖拼接】APP將高度過長的網頁拼接成一張圖,那麼如何在windows電腦上實現長圖拼接?


準備工具

小畫家(Photoshop也能辦到,但是太折騰) + chrome的FireShot

當然以下範例可以使用FireShot的【截取整個頁面】輕鬆完成,但是如果有FireShot不能處理的情況,如欲截取的內容為彈窗。可使用以下方法

開始

以yahoo新聞為例

從頂部截取第一張圖

FireShot => 截取可見部分

截取第二張圖

網頁往下拉至上一張圖的尾端 => FireShot => 截取可見部分


打開小畫家

檔案=> 調整檔案大小 => (調整大小)像素 => 取消勾選【維持外觀比例】 => 垂直:調整成一個比較大的值

因為yahoo新聞背景是白色的,所以我們先對原本的背景上色,讓之後裁剪時比較好處理


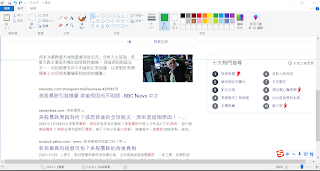
複製第一張圖片至小畫家

在小畫家中直接ctrl + v 貼上


複製第二張圖片至小畫家

一樣在 FireShot Capture頁簽裡面複製圖片,然後在小畫家中移動到第一張圖片的尾部


ctrl+v貼上

貼上後保持第二張圖片的選取狀態,然後使用鍵盤的上下左右(↑↓←→)去調整第二張圖到適合的位置

剪裁

檢視 => 縮小(直到適合剪裁的大小)

常用 => 選取:適合的大小 (在之前有設定底色,這步驟會比較好選取)

裁剪

然後在小畫家裡面把他保存成png


總結

雖然在細節處理上不如Photoshop,但是方法簡單粗暴,而且不需要安裝特殊的工具(小畫家windows系統內建,chrome更是每個電腦必備,FireShot插件安裝無壓力)


2022年1月8日 星期六

scoop 和nvm 使用心得

安裝scoop

scoop是 Windows 軟件管理器
需使用 Windows PowerShell 安裝
PS C:\Users\user> iwr -useb get.scoop.sh | iex
For example, to set the execution policy to 'RemoteSigned' please run :
'Set-ExecutionPolicy RemoteSigned -scope CurrentUser'

如果Windows PowerShell報錯中文亂碼

https://superuser.com/a/653716  How do I change my cmd.exe to English?
使用 chcp 可以查當前的code,然後切換成英文
C:\Users\user> chcp 437
Active code page: 437

如果報錯則執行

PS C:\Users\user> Set-ExecutionPolicy RemoteSigned -scope CurrentUser
Execution Policy Change
The execution policy helps protect you from scripts that you do not trust. Changing the execution policy might expose
you to the security risks described in the about_Execution_Policies help topic at
https:/go.microsoft.com/fwlink/?LinkID=135170. Do you want to change the execution policy?
[Y] Yes  [A] Yes to All  [N] No  [L] No to All  [S] Suspend  [?] Help (default is "N"): Y

再試一次

PS C:\Users\user> iwr -useb get.scoop.sh | iex
Initializing...
Downloading scoop...
Extracting...
Creating shim...
Downloading main bucket...
Extracting...
Adding ~\scoop\shims to your path.
'lastupdate' has been set to '2022-01-08T20:48:03.5639640+08:00'
Scoop was installed successfully!
Type 'scoop help' for instructions.

測試

PS C:\Users\user> scoop help
Usage: scoop <command> [<args>]

Some useful commands are:

alias       Manage scoop aliases
bucket      Manage Scoop buckets
cache       Show or clear the download cache
cat         Show content of specified manifest.
checkup     Check for potential problems
cleanup     Cleanup apps by removing old versions
config      Get or set configuration values
create      Create a custom app manifest
depends     List dependencies for an app
export      Exports (an importable) list of installed apps
help        Show help for a command
hold        Hold an app to disable updates
home        Opens the app homepage
info        Display information about an app
install     Install apps
list        List installed apps
prefix      Returns the path to the specified app
reset       Reset an app to resolve conflicts
search      Search available apps
status      Show status and check for new app versions
unhold      Unhold an app to enable updates
uninstall   Uninstall an app
update      Update apps, or Scoop itself
virustotal  Look for app's hash on virustotal.com
which       Locate a shim/executable (similar to 'which' on Linux)

Type 'scoop help <command>' to get help for a specific command.

如果安裝時報SSL錯誤

可能是你IE版本太舊,在 Windows PowerShell 嘗試使用以下命令解決
[Net.ServicePointManager]::SecurityProtocol = [Net.SecurityProtocolType]::Tls12

安裝社區提供的 bucket

https://sspai.com/post/52710  给 Scoop 加上这些软件仓库,让它变成强大的 Windows 软件管理器
(可以在git bash裡執行)
$ scoop bucket add dorado https://github.com/h404bi/dorado
Checking repo... ok
The dorado bucket was added successfully.

scoop的目錄就是裝在 ~/scoop 下
~/scoop
$ ls
apps/  buckets/  shims/

安裝APP

scoop install dorado/<App 名>
$ scoop install dorado/redis-desktop-manager

查已安裝的APP

$ scoop list
Installed apps:

  7zip 21.07 [main]
  redis-desktop-manager 2021.10 [dorado]

使用scoop安裝nvm

$ scoop install main/nvm

$ nvm -v
Running version 1.1.9.
...

因為我的nodejs是官網msi安裝檔裝的,實際測試使用scoop 安裝的nvm無法切換新的nodejs版本,所以移除scoop安裝的nvm
$ scoop uninstall nvm

為什麼要安裝nvm

https://stackoverflow.com/a/64820435  Is there any way to fix package-lock.json lockfileVersion so npm uses a specific format?
因為兩個不同開發者用了不同版本的nodejs(14/16)和npm在同一個項目,造成新版本nodejs在npm install 時package-lock.json會產生 "lockfileVersion": 2 


安裝nvm

https://github.com/nvm-sh/nvm  Node Version Manager
預設安裝到 C:\Users\user\AppData\Roaming\nvm ,會偵測到系統的nodejs 目錄 C:\Program Files\nodejs
安裝完設定環境變量

然後就能正常切換nodejs版本
$ node -v
v14.17.5

安裝nodejs 16

$ nvm install 16
Downloading node.js version 16.13.1 (64-bit)...
Extracting...
Complete
Installation complete. If you want to use this version, type
nvm use 16.13.1

$ nvm list
    16.13.1
  * 14.17.5 (Currently using 64-bit executable)

$ nvm use 16.13.1

$ node -v
v16.13.1


2021年7月11日 星期日

寶塔、phpstudy、phpEnv 使用心得

前言

之前一直使用XAMPP當做windows的測試環境,但是有以下缺點:
1. 不能切換php版本
2. 用的是apache不是nginx
3. 無php擴展安裝
4. 無偽靜態配置
5. 無軟件管理
優點:
netstat 本機端口監聽圖形界面  => 但是可以用 windows 內建功能【資源監視器(resmon)】中的【接聽連接埠】取代

為了能使用低版本的php測試SQL注入,和使用不同版本的php測試不同專案
改使用以下工具

寶塔

優點

支持linux和windows
可安裝php 5.2 - 8.0 多版本的php,並快速切換php版本,安裝php擴展
linux可安裝5.1-8.0 版本的mysql,windows可安裝5.5-8.0 版本的mysql。可安裝mariadb
面板可查到mysql密碼
內建不同php框架的nginx偽靜態模板
linux版本在面板快速切換php cli的版本
面板整合:反向代理、重定向、計劃任務、SSL、防火墻

特點

新項目自動生成.user.ini 、index.html、404.html
面板上安裝PHP後會自動安裝composer


缺點

pecl只支持到php 7.3,不支持php 7.4、php 8.0

CentOS 安裝寶塔

https://www.bt.cn/download/linux.html  宝塔Linux面板 7.7.0
https://www.shopee6.com/web/web-tutorial/remove-bt-panel-forced-login.html  一键解决BT宝塔面板的强制登陆限制要求教程

安裝

# yum install -y wget && wget -O install.sh http://download.bt.cn/install/install_6.0.sh && sh install.sh

去除登錄(windows版本不需要)

# sed -i "s|if (bind_user == 'True') {|if (bind_user == 'REMOVED') {|g" /www/server/panel/BTPanel/static/js/index.js
# rm -rf /www/server/panel/data/bind.pl

查面板登錄信息

# bt 
(然後 prompt輸入14)


CentOS安裝特定版本XDebug

因為寶塔後台php 8 裝的xdebug版本是 v3.0.0
# php -v
PHP 8.0.8 (cli) (built: Jul 13 2021 10:56:23) ( NTS )
Copyright (c) The PHP Group
Zend Engine v4.0.8, Copyright (c) Zend Technologies
    with Xdebug v3.0.0, Copyright (c) 2002-2020, by Derick Rethans

但是 v3.0.0 有bug,在停在斷點時取消斷點,會中止xdebug調試。又寶塔的php 8沒有pecl,所以需要手動安裝 xdebug-3.0.4

下載 xdebug-3.0.4

# wget https://xdebug.org/files/xdebug-3.0.4.tgz

解壓縮

# tar -zxf xdebug-3.0.4.tgz

進入目錄

# cd xdebug-3.0.4/

# phpize

直接configure 會失敗

# ./configure --enable-xdebug
checking for grep that handles long lines and -e... /usr/bin/grep
...
configure: error: Cannot find php-config. Please use --with-php-config=PATH

需指定php 8的php-config 路徑

# ./configure --enable-xdebug --with-php-config=/www/server/php/80/bin/php-config 
# make
# make install

即安裝成功

# php -v
PHP 8.0.8 (cli) (built: Jul 13 2021 10:56:23) ( NTS )
Copyright (c) The PHP Group
Zend Engine v4.0.8, Copyright (c) Zend Technologies
    with Xdebug v3.0.4, Copyright (c) 2002-2021, by Derick Rethans

設定php.ini

/www/server/php/80/etc/php.ini
[xdebug]
zend_extension="/path/xdebug-3.0.4/xdebug.so"
xdebug.mode=debug
xdebug.client_host=192.168.1.x

configure報錯

# ./configure --enable-xdebug --with-php-config=/www/server/php/72/bin/php-config
configure: WARNING: You will need re2c 0.13.4 or later if you want to regenerate PHP parsers.
=> 安裝re2c  # yum install re2c
checking for gawk... gawk
checking whether to enable Xdebug support... yes, shared
checking whether to enable Xdebug developer build flags... no
./configure: line 4483: syntax error near unexpected token `-Wbool-conversion,'
=> 重新安裝PHP 7.2
./configure: line 4483: `    AX_CHECK_COMPILE_FLAG(-Wbool-conversion,                _MAINTAINER_CFLAGS="$_MAINTAINER_CFLAGS -Wbool-conversion")'


wget時https證書過期

# wget https://xdebug.org/files/xdebug-3.1.5.tgz
...
ERROR: cannot verify xdebug.org's certificate, issued by ‘/C=US/O=Let's Encrypt/CN=R3’:
  Issued certificate has expired.
To connect to xdebug.org insecurely, use `--no-check-certificate'.

加 --no-check-certificate 或 # yum update ca-certificates  

Windows 安裝特定版本的XDebug

https://xdebug.org/download 直接下載 Windows binaries ,如 PHP 8.0 VS16 (64 bit)  
然後直接修改 php.ini
C:\BtSoft\php\80\php.ini
zend_extension="C:\BtSoft\php\80\ext\php_xdebug-3.0.4-8.0-vs16-nts-x86_64.dll"
xdebug.mode = debug
xdebug.client_port = 9003
xdebug.client_host = "192.168.1.x"
xdebug.idekey=PHPSTORM

避免Windows寶塔開機自動啟動服務

Windows服務中將以下的服務的啟動類型改成【手動】
btPanel
btTask
mysql
nginx

安裝不同版本的MySQL

https://www.cnblogs.com/bjlhx/p/10538781.html  007-docker-安装-mysql:5.6
因為寶塔已經安裝了MySQL5.7,一次只能安裝一個MySQL,如果要同時安裝不同版本的MySQL需使用docker
以MySQL 5.6為例
新建目錄 /root/my-mysql-5.6  ,將MySQL資料放在這裡
# docker run -p 23306:3306 --name my-mysql-5.6 -v /root/my-mysql-5.6:/var/lib/mysql -e MYSQL_ROOT_PASSWORD=123456 -d mysql:5.6 --character-set-server=utf8mb4 --collation-server=utf8mb4_unicode_ci
Unable to find image 'mysql:5.6' locally
5.6: Pulling from library/mysql
..
第一次會拉取官方mysql:5.6鏡像

如果你的機器不能訪問MySQL 5.6 服務可以進入容器這樣做
# docker exec -it my-mysql-5.6 bash
root@c5fe23e1a123:/# mysql -u root -p
mysql> GRANT ALL PRIVILEGES ON *.* TO 'root'@'%' ;
Query OK, 0 rows affected (0.00 sec)

就可以以23306端口訪問MySQL 5.6服務

--character-set-server=utf8mb4 => 讓你的 character_set_server 是 utf8mb4 而不是latin1
--collation-server=utf8mb4_unicode_ci => 讓你的 collation_server 是 utf8mb4_unicode_ci 而不是latin1_swedish_ci

安裝beanstalkd 和 beanstalkd-console

如果開發環境選用寶塔而不是laradock,而寶塔軟件管理無beanstalk,可使用docker
# docker run -d -p 11300:11300 --name beanstalkd schickling/beanstalkd
# docker run -d -p 2080:2080 --link beanstalkd:beanstalkd schickling/beanstalkd-console
然後即可透過瀏覽器訪問 beanstalkd-console 


一直提示open_basedir restriction in effect(windows server 2016)

https://www.bt.cn/bbs/thread-6877-1-1.html  一直提示open_basedir restriction in effect
網站目錄 =》 取消勾選【防跨站攻击(open_basedir)】

phpstudy

版本  8.1.1.3

優點

可安裝php 5.2 - 8.0 多版本的php,並快速切換php版本,安裝php擴展
可安裝5.1-8.0 版本的mysql
面板可查到mysql密碼
mysql不佔用windows服務,不與XAMPP和寶塔產生服務路徑衝突 => 裝了寶塔的mysql後phpstudy的mysql就起不來了

特點

面板設置nginx偽靜態(編輯=>偽靜態和偽靜態是相同的),設完後在專案目錄下將偽靜態寫入 nginx.htaccess(nginx)或 .htaccess(apache)。
網站自動生成index.html 入口文件
網站自動生成 error 錯誤頁面目錄

缺點

php小版本非最新版
php-fpm 9000端口和phpstorm xdebug 端口衝突,需要更改xdebug端口

phpEnv

版本 8.9.0

優點

可離線安裝(預設只有php 7.4,面板軟件商店下載解壓縮後即完成php多版本安裝)
php-fpm 和phpstorm xdebug 端口不衝突 
可安裝php 5.2 - 8.2 多版本的php,並快速切換php版本
面板可改MySQL密碼
內建不同php框架的nginx URL重寫模板
可安裝redis MySQL
預設裝好composer(phpEnv\tools\Composer\composer.phar)

同時跑多版本MySQL

phpEnv裝 MySQL 5.7
到MySQL官網下載MySQL 8.0
https://dev.mysql.com/downloads/file/?id=516927
下載 mysql-installer-community-8.0.32.0.msi ,雙擊執行安裝
選擇 Server only
(一直下一步)
使用3308端口,避免和MySQL 5.7 3306 衝突
(一直下一步)
設定MySQL密碼
服務名:MySQL80
(一直下一步完成安裝)
在服務中啟動/停用 MySQL 8.0服務


結論

推薦使用寶塔做開發環境
推薦使用phpEnv做開發環境 


2021年6月2日 星期三

frp 心得

 概覽

frp是內網穿透的反向代理工具,支持多種服務(HTTP、SSH、RDP),需要準備一台VPS

相關連接

文檔

下載


服務器

查CPU型號(AMD、Intel、ARM)

# grep -i core /proc/cpuinfo
model name      : AMD EPYC 7601 32-Core Processor

下載、解壓縮、進入目錄

# wget https://github.com/fatedier/frp/releases/download/v0.36.2/frp_0.36.2_linux_amd64.tar.gz
# tar zxvf frp_0.36.2_linux_amd64.tar.gz
# cd frp_0.36.2_linux_amd64/

編輯 frps.ini


[common]
# frp监听的端口,默认是7000,可以改成其他的
bind_port = 7000
# 授权码,请改成更复杂的
token = 12345678
# HTTP 类型代理监听的端口
vhost_http_port = 8080
# frpc 設置 tls_enable = true 才能連,連線做tls加密
tls_only = true
# tls_trusted_ca_file 内容是有效的话,客戶端要配置tls_cert_file和tls_key_file 才能連
tls_trusted_ca_file = /frp_tls_files/ca.crt

# frp管理后台端口,请按自己需求更改
dashboard_port = 7500
# frp管理后台用户名和密码,请改成自己的
dashboard_user = admin
dashboard_pwd = admin
enable_prometheus = true
# 二级域名后缀
subdomain_host = yourdomain.com

# frp日志配置
log_file = /var/log/frps.log
log_level = info
log_max_days = 3
s

設置和啟動frp服務

在frp目錄下執行
mkdir -p /etc/frp
cp frps.ini /etc/frp
cp frps /usr/bin
cp systemd/frps.service /usr/lib/systemd/system/
systemctl enable frps
systemctl start frps
s

防火墻放行端口

# 添加监听端口
firewall-cmd --permanent --add-port=7000/tcp
# 添加管理后台端口
firewall-cmd --permanent --add-port=7500/tcp
firewall-cmd --reload
s

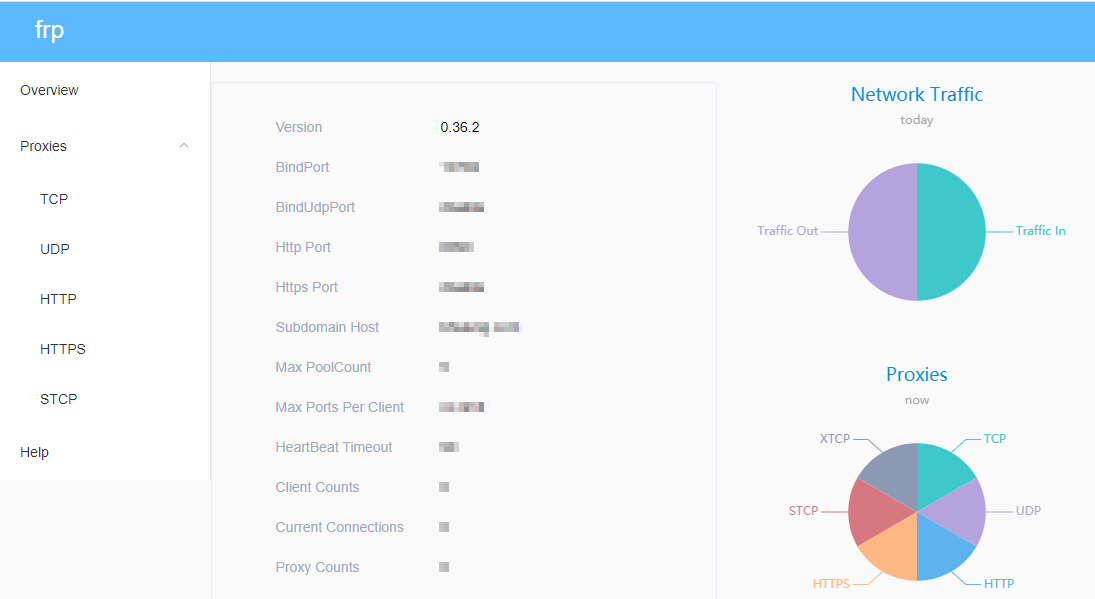
訪問frp後台

瀏覽器打開"http://服務器IP:後台管理端口" ,輸入用戶名和密碼可以查看連接狀態:


客戶端

下載frp

到  https://github.com/fatedier/frp/releases ,下載最新版客戶端
windows:32位系統 frp_0.36.2_windows_386.zip ,64位系統  frp_0.36.2_windows_amd64.zip  ,不知道系統多少下載32位

解壓縮下載的壓縮包,進入文件夾內

編輯 frpc.ini 

(提供服務的遠程電腦)
# 服务端配置
[common]
server_addr = 服务器ip
# 请换成设置的服务器端口
server_port = 7000
token = 12345678
# 自定义 TLS 协议加密
tls_enable = true
tls_cert_file = C:\frp_tls_files\client.crt
tls_key_file = C:\frp_tls_files\client.key

# 配置http服务,可用于小程序开发、远程调试等
[web]
type = http
local_ip = 127.0.0.1
local_port = 80
subdomain = win
# 将 frpc 与 frps 之间的通信内容加密传输,将会有效防止传输内容被截取。
use_encryption = true
# 对传输内容进行压缩,可以有效减小 frpc 与 frps 之间的网络流量,加快流量转发速度,但是会额外消耗一些 CPU 资源。
use_compression = true
# 设置 BasicAuth 鉴权
http_user = abc
http_pwd = abc

# 配置遠程桌面服務
[secret_rdp]
# stcp(secret tcp) 类型的代理可以避免让任何人都能访问到要穿透的服务,但是访问者也需要运行另外一个 frpc 客户端。
type = stcp
# 只有 sk 一致的用户才能访问到此服务
sk = abcdefg
local_ip = 127.0.0.1
local_port = 3389
use_encryption = true
use_compression = true
s
ps.
1. 一個服務端可以同時給多個客戶端使用
2. [ssh]這樣的名稱必須全局唯一,即就算有多個客戶端,也只能使用一次,其他的可以用[ssh2]、[ssh3]等;
3. 除了type為http/https,端口只能被一個服務使用

客戶端連上服務端

git bash 進入frp目錄,然後執行
$ ./frpc.exe -c frpc.ini

後台查狀態

登錄frp管理後台,應該可以看到客戶端已經連上來了

firewalld

firewalld 啟動失敗

原本用iptables,要改用firewalld,但是 firewalld 啟動失敗
# systemctl start firewalld
Failed to start firewalld.service: Unit is masked.

解法

# systemctl unmask --now firewalld
Removed symlink /etc/systemd/system/firewalld.service.
# systemctl enable firewalld
Created symlink from /etc/systemd/system/dbus-org.fedoraproject.FirewallD1.service to /usr/lib/systemd/system/firewalld.service.
Created symlink from /etc/systemd/system/basic.target.wants/firewalld.service to /usr/lib/systemd/system/firewalld.service.
# systemctl start firewalld


檢查 firewalld 設定

使用 --list-all 檢查
# firewall-cmd --list-all
查可用的zones
# firewall-cmd  --get-zones
查預設的zone
# firewall-cmd --get-default-zone
public
查當前zone開放的端口
# firewall-cmd --list-ports
新增可用的端口
# firewall-cmd --add-port=port-number/port-type
如:
# firewall-cmd --add-port=8080/tcp
讓新的設定永久生效
# firewall-cmd --runtime-to-permanent


openssl升級

因為使用到證書登錄,證書登錄用到了openssl,但是openssl舊版有 Heartbleed bug 如果你的openssl太舊,需要升級openssl,到 https://www.openssl.org/source/ 下載最新的openssl

安裝

# wget https://www.openssl.org/source/openssl-1.1.1k.tar.gz
# tar zxf openssl-1.1.1k.tar.gz
# cd openssl-1.1.1k/
# ./config
# make
# make test
# make install

測試新裝的openssl

# /usr/local/bin/openssl version
/usr/local/bin/openssl: error while loading shared libraries: libssl.so.1.1: cannot open shared object file: No such file or directory

解法

# ln -s /usr/local/lib64/libssl.so.1.1 /usr/lib64/
# ln -s /usr/local/lib64/libcrypto.so.1.1 /usr/lib64/

再次測試

# /usr/local/bin/openssl version
OpenSSL 1.1.1k  25 Mar 2021

替換新舊版本

# mv /usr/bin/openssl  /usr/bin/openssl-old
# ln -s /usr/local/bin/openssl /usr/bin/openssl
# openssl version
OpenSSL 1.1.1k  25 Mar 2021

自定義 TLS 協議加密

生成服務器私鑰

# openssl genrsa -out ca.key 1024
Generating RSA private key, 1024 bit long modulus (2 primes)
.....+++++
.......+++++
e is 65537 (0x010001)

# ls
ca.key

根據私鑰生成證書申請文件csr

# openssl req -new -key ca.key -out ca.csr
You are about to be asked to enter information that will be incorporated
into your certificate request.
What you are about to enter is what is called a Distinguished Name or a DN.
There are quite a few fields but you can leave some blank
For some fields there will be a default value,
If you enter '.', the field will be left blank.
-----
Country Name (2 letter code) [AU]:CN
State or Province Name (full name) [Some-State]:Shanghai
Locality Name (eg, city) []:Shanghai
Organization Name (eg, company) [Internet Widgits Pty Ltd]:JY
Organizational Unit Name (eg, section) []:JY
Common Name (e.g. server FQDN or YOUR name) []:*.yourdomain.com   # 這裡輸入你的域名,*.yourdomain.com生成通配符域名證書
Email Address []:yourname@email.com

Please enter the following 'extra' attributes
to be sent with your certificate request
A challenge password []:  # 這裡輸入密碼,沒有密碼可以空
An optional company name []:JY

# ls
ca.csr  ca.key

私鑰對證書申請進行簽名從而生成證書

# openssl x509 -req -in ca.csr -out ca.crt -signkey ca.key -days 3650
Signature ok
subject=C = CN, ST = Shanghai, L = Shanghai, O = JY, OU = JY, CN = *.yourdomain.com, emailAddress = yourname@email.com
Getting Private key

# ls
ca.crt  ca.csr  ca.key

生成 frpc 的私鑰

# openssl genrsa -out client.key 2048
Generating RSA private key, 2048 bit long modulus (2 primes)
..........+++++
................................................+++++
e is 65537 (0x010001)

# ls
ca.crt  ca.csr  ca.key  client.key

準備默認 OpenSSL 配置文件於當前目錄

# cp /etc/pki/tls/openssl.cnf ./my-openssl.cnf
# ls
ca.crt  ca.csr  ca.key  client.key  my-openssl.cnf

根據frpc的私鑰生成frpc的證書申請文件csr

# openssl req -new -sha256 -key client.key \
>     -subj "/C=XX/ST=DEFAULT/L=DEFAULT/O=DEFAULT/CN=client.com" \
>     -reqexts SAN \
>     -config <(cat my-openssl.cnf <(printf "\n[SAN]\nsubjectAltName=DNS:client.com,DNS:example.client.com")) \
>     -out client.csr
# ls
ca.crt  ca.csr  ca.key  client.csr  client.key  my-openssl.cnf

ps. 使用 client.com 沒事,即使這是無效的域名,不影響使用

生成 frpc 的證書(用到ca.crt和ca.key)

# openssl x509 -req -days 365 \
>     -in client.csr -CA ca.crt -CAkey ca.key -CAcreateserial \
> -extfile <(printf "subjectAltName=DNS:client.com,DNS:example.client.com") \
> -out client.crt
Signature ok
subject=C = XX, ST = DEFAULT, L = DEFAULT, O = DEFAULT, CN = client.com
Getting CA Private Key
# ls
ca.crt  ca.csr  ca.key  ca.srl  client.crt  client.csr  client.key  my-openssl.cnf


當 服務器的frps.ini 配置的 tls_trusted_ca_file 是有效的 ca.crt 時,客戶端frpc.ini 的 tls_cert_file 和 tls_key_file 必須是有效的 client.crt 和 client.key 。完成frps 單向驗證 frpc 的身份

nginx反向代理frp後台

因為cloudflare免費的只能代理80端口,想要用cloudflare的https訪問frp後台,可以這樣做
nginx新增配置:
  
server
{
    server_name  frp.yourdomain.com;

    location / {
        proxy_pass         http://127.0.0.1:7500;
        proxy_set_header   Host             $host;
        proxy_set_header   X-Real-IP        $remote_addr;
        proxy_set_header   X-Forwarded-For  $proxy_add_x_forwarded_for;
    }
}
  
s

在想要訪問內網服務的機器上也部署 frpc

frpc.ini配置如下:
  
# 服务端配置
[common]
(同提供服務的遠程電腦的frpc.ini)

[secret_ssh_visitor]
type = stcp
# stcp 的访问者
role = visitor
# 要访问的 stcp 代理的名字
server_name = secret_rdp
sk = abcdefg
# 绑定本地端口用于访问 SSH 服务
bind_addr = 127.0.0.1
bind_port = 13389
  
s

訪問內網穿透服務

web

提供服務的遠程電腦打開web服務,外網任意一台電腦可直接訪問 https://win.yourdomain.com/ ,即使遠程電腦的web服務

secret_rdp

外網電腦打開Windows 遠端桌面連線,輸入  127.0.0.1:13389 就可以連接到本地Windows
注意一定要開啟windows電腦的【啟用遠端桌面】

將 frp 封裝成 windows 後台服務

使用 NSSM 將 frp 封裝成 windows 服務,可以在後台運行,並且開機自啟動

安裝nssm且新增frpc服務

下載 nssm 2.24  後解壓縮,(打開git bash)進入 nssm-2.24 目錄
/path/nssm-2.24/win64
$ ./nssm.exe install frpc
Administrator access is needed to install a service.


在彈出的對話框中填寫
Path: C:\path\frp_0.36.2_windows_386\frpc.exe
Startup directory: C:\path\frp_0.36.2_windows_386
Arguments: -c C:\path\frp_0.36.2_windows_386\frpc.ini

Details頁簽可以設定是否開機(Startup type)自動啟動:automatic / manual 

編輯服務配置

$ ./nssm.exe edit frpc

啟動和停止

用命令【啟動】和【停止】實際測試無效
$ ./nssm.exe start frpc
Can't open service!
OpenService(): 存取被拒。
$ ./nssm.exe stop frpc
Can't open service!
OpenService(): 存取被拒。

要用這方式停止
運行 services.msc ,可以打開 windows 的服務管理器。在這裡面手動停用/啟動

刪除服務

$ ./nssm.exe remove frpc
Administrator access is needed to remove a service.


參考資料

https://www.vpsjxw.com/vps_use/vps_frp_intro/  vps+frp内网穿透,外网远程访问局域网内主机的ssh、远程桌面、网站服务
https://tlanyan.me/frp-tunnel-tutorial/  frp内网穿透教程(主要)
https://bobcares.com/blog/failed-to-start-firewalld-service-unit-is-masked/  Failed to start firewalld service unit is masked – How we fix it!
https://www.4spaces.org/how-to-upgrade-openssl-on-centos-7/  CentOS如何升级openssl到最新版本
https://ningyu1.github.io/site/post/51-ssl-cert/  Openssl生成自签名证书,简单步骤
https://www.sohu.com/a/416379503_610671  教你用FRP做内网穿透 使用远程桌面连接家里的windows电脑


2021年1月21日 星期四

python心得

環境

windows 10

檢查python版本

(使用git bash)
$ python --version
Python 3.7.7

查pip版本

$ pip --version
pip 19.2.3 from c:\users\user\appdata\local\programs\python\python37-32\lib\site-packages\pip (python 3.7)

看目前系統有安裝哪些套件

$ pip list
Package    Version
---------- -------
pip        19.2.3
setuptools 41.2.0
WARNING: You are using pip version 20.2.3; however, version 20.3.3 is available.
You should consider upgrading via the 'c:\users\bear\appdata\local\programs\python\python39\python.exe -m pip install --upgrade pip' command.

升級pip

$ python -m pip install --upgrade pip
Collecting pip
  Downloading pip-21.0-py3-none-any.whl (1.5 MB)
     |████████████████████████████████| 1.5 MB 469 kB/s
Installing collected packages: pip
  Attempting uninstall: pip
    Found existing installation: pip 20.2.3
    Uninstalling pip-20.2.3:
      Successfully uninstalled pip-20.2.3
Successfully installed pip-21.0

$ pip --version
pip 21.0 from c:\users\user\appdata\local\programs\python\python39\lib\site-packages\pip (python 3.9)


升級python

https://stackoverflow.com/a/57292808  How do I upgrade the Python installation in Windows 10?
直接到python官網下載最新的python安裝檔
如果你是要升級小版本3.x.y 到 3.x.z,可以直接【Upgrade Now】
如果你是要升級中版本3.x 到 3.y,安裝檔會提示你【Install Now】
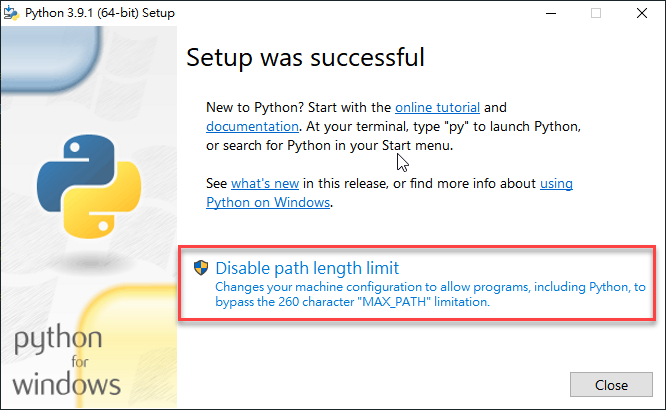
安裝完成(我有禁用path length limit)

In this case, you are not upgrading, but you are installing a new version of Python. You can have more than one version installed on your machine. They will be located in different directories.
這種情況,你不是升級,你是安裝新版本的python。你的系統有多個python版本在不同的目錄。

使用py指定python版本

$ py -3.7
Python 3.7.7 (tags/v3.7.7:d7c567b08f, Mar 10 2020, 09:44:33) [MSC v.1900 32 bit (Intel)] on win32
Type "help", "copyright", "credits" or "license" for more information.
>>>

$ py -3.9
Python 3.9.1 (tags/v3.9.1:1e5d33e, Dec  7 2020, 17:08:21) [MSC v.1927 64 bit (AMD64)] on win32
Type "help", "copyright", "credits" or "license" for more information.
>>>


設定環境變量

設定=》系統=》關於=》進階系統設定
環境變數
編輯Path
將原本python 3.7的路徑改成3.9的
C:\Users\user\AppData\Local\Programs\Python\Python37-32\Scripts\
C:\Users\user\AppData\Local\Programs\Python\Python37-32\
改成
C:\Users\user\AppData\Local\Programs\Python\Python39\Scripts\
C:\Users\user\AppData\Local\Programs\Python\Python39\

然後開新的prompt檢查版本
$ python --version
Python 3.9.1

$ pip --version
pip 20.2.3 from c:\users\user\appdata\local\programs\python\python39\lib\site-packages\pip (python 3.9)

編輯器

PyCharm Professional 2020.3

斷點

File => Open (打開空目錄時,如C:\python\hello),會自動生成 main.py
這個檔案會教你怎麼用PyCharm的斷點,Debug(Shift+F9)即可開始斷點


熱鍵

自定義

Resume Program => F9


正確打開新項目的姿勢

File => New Project 
New environment using(環境使用):【Virtualenv】(venv)
Base interpreter: C:\Users\user\AppData\Local\Programs\Python\Python39\python.exe  (如果你裝了2個python(3.7和3.9),要在這邊選IDE環境的python版本)

這樣項目下才會有venv目錄

.gitignore 忽略掉venv和.idea目錄

.gitignore
venv/
.idea/

爬蟲

https://www.learncodewithmike.com/2020/05/python-selenium-scraper.html  [Python爬蟲教學]整合Python Selenium及BeautifulSoup實現動態網頁爬蟲

在PyCharm 中安裝Selenium

Settings => Project: project_name => Python Interpreter => +
搜尋Selenium =》 Install Package
然後就可以看到成功安裝selenium,和相依賴的package(urllib3)
這樣只裝在IDE的環境中,沒安裝在系統上,所以git bash上面pip list還是沒有selenium。直接命令行執行會報錯
$ python crawler.py
Traceback (most recent call last):
  File "C:\bear\python\hello3\crawler.py", line 1, in <module>
    from selenium import webdriver
ModuleNotFoundError: No module named 'selenium'

系統安裝selenium

$ pip install selenium
Collecting selenium
  Using cached selenium-3.141.0-py2.py3-none-any.whl (904 kB)
Collecting urllib3
  Using cached urllib3-1.26.2-py2.py3-none-any.whl (136 kB)
Installing collected packages: urllib3, selenium
Successfully installed selenium-3.141.0 urllib3-1.26.2

命令行執行(需先配置好webdriver)

$ python crawler.py
DevTools listening on ws://127.0.0.1:60865/devtools/browser/c51ba9ea-08d4-45f8-bee0-5780695b15ef
老天尊的死期

安裝Webdriver

前往Python套件儲存庫PyPI(Python Package Index) 查詢Selenium 

點進去後,往下可以看到Drivers的地方,下載chromedriver

下載你chrome瀏覽器相對應的 ChromeDriver  
解壓縮 chromedriver_win32.zip 放到Python網頁爬蟲的專案資料夾中,如下圖:

第一個爬蟲程式


from selenium import webdriver
from selenium.webdriver.chrome.options import Options
import time

options = Options()
options.add_argument("--disable-notifications")

chrome = webdriver.Chrome('./chromedriver', options=options)
chrome.get("https://carlislebear.blogspot.com/")

print(chrome.title)
chrome.quit()
s
Line 5-6:options物件,主要用途為取消網頁中的彈出視窗,避免妨礙網路爬蟲的執行。
Line 8:就是建立webdriver物件,傳入剛剛所下載的「瀏覽器驅動程式路徑(chromedriver)-可略」及「瀏覽器設定(options)-可選」

執行


Line 11:chrome.title打印爬蟲網頁的標題,在Console 中也可以打印變數

第二個爬蟲程式

https://officeguide.cc/windows-python-selenium-automation-scripts-tutorial-examples/  Windows 使用 Python + Selenium 自動控制瀏覽器教學與範例
https://stackoverflow.com/a/39191349  NoSuchElementException - Unable to locate element
https://stackoverflow.com/a/44834542  Switch to an iframe through Selenium and python

目的:打開blog =》 搜尋python =》 取第一篇文章的標題


from selenium import webdriver
from selenium.webdriver.chrome.options import Options

from selenium.common.exceptions import TimeoutException
from selenium.webdriver.support.ui import WebDriverWait
from selenium.webdriver.support import expected_conditions as EC
from selenium.webdriver.common.by import By

options = Options()
options.add_argument("--disable-notifications")

# chrome = webdriver.Chrome('./chromedriver', options=options)
chrome = webdriver.Chrome()
chrome.get("https://carlislebear.blogspot.com/")

iframe = chrome.find_element_by_name('navbar-iframe')
chrome.switch_to.frame(iframe)
b_query = chrome.find_element_by_id('b-query').send_keys('python')
chrome.find_element_by_xpath('//*[@id="b-query-icon"]').click()

try:
    WebDriverWait(chrome, 3).until(EC.element_to_be_clickable((By.XPATH, '//*[@id="Blog1"]/div[1]')))
    print(chrome.find_element_by_xpath('//*[@id="Blog1"]/div[1]/div[3]/div/div/div/h3').text)
except TimeoutException:
    print('等待逾時!')

chrome.quit()
s
Line 5-7 & Line 23-24:搜尋後直到內容出來後再打印出第一篇文章標題
Line 16-17:切換到上方iframe,否則會報錯
NoSuchElementException: Message: no such element: Unable to locate element
Line 16、18、19:可以使用find_element_by_name、find_element_by_id、find_element_by_xpath選擇DOM

如何快速寫出XPATH?

chrome 開發者工具DOM上右鍵 =》Copy=》 Copy XPath
剪貼簿中得到:
//*[@id="b-query-icon"]

如何驗證XPath?

開發者工具Console中使用 $x ,如:
$x('//*[@id="b-query-icon"]')

使用BeautifulSoup抓取所有文章標題

需安裝beautifulsoup4
 from selenium.webdriver.support import expected_conditions as EC
 from selenium.webdriver.common.by import By

+from bs4 import BeautifulSoup
+
 options = Options()
 options.add_argument("--disable-notifications")

@@ -21,6 +23,11 @@ chrome.find_element_by_xpath('//*[@id="b-query-icon"]').click()
 try:
     WebDriverWait(chrome, 3).until(EC.element_to_be_clickable((By.XPATH, '//*[@id="Blog1"]/div[1]')))
     print(chrome.find_element_by_xpath('//*[@id="Blog1"]/div[1]/div[3]/div/div/div/h3').text)
+    soup = BeautifulSoup(chrome.page_source, 'html.parser')
+    titles = soup.find_all('h3', {
+        'class': 'post-title'})
+    for title in titles:
+        print(title.getText())
 except TimeoutException:
     print('等待逾時!')

輸出: